1. INTRODUCTION
Thank you for choosing AQUALAB Cloud from Addium, Inc.
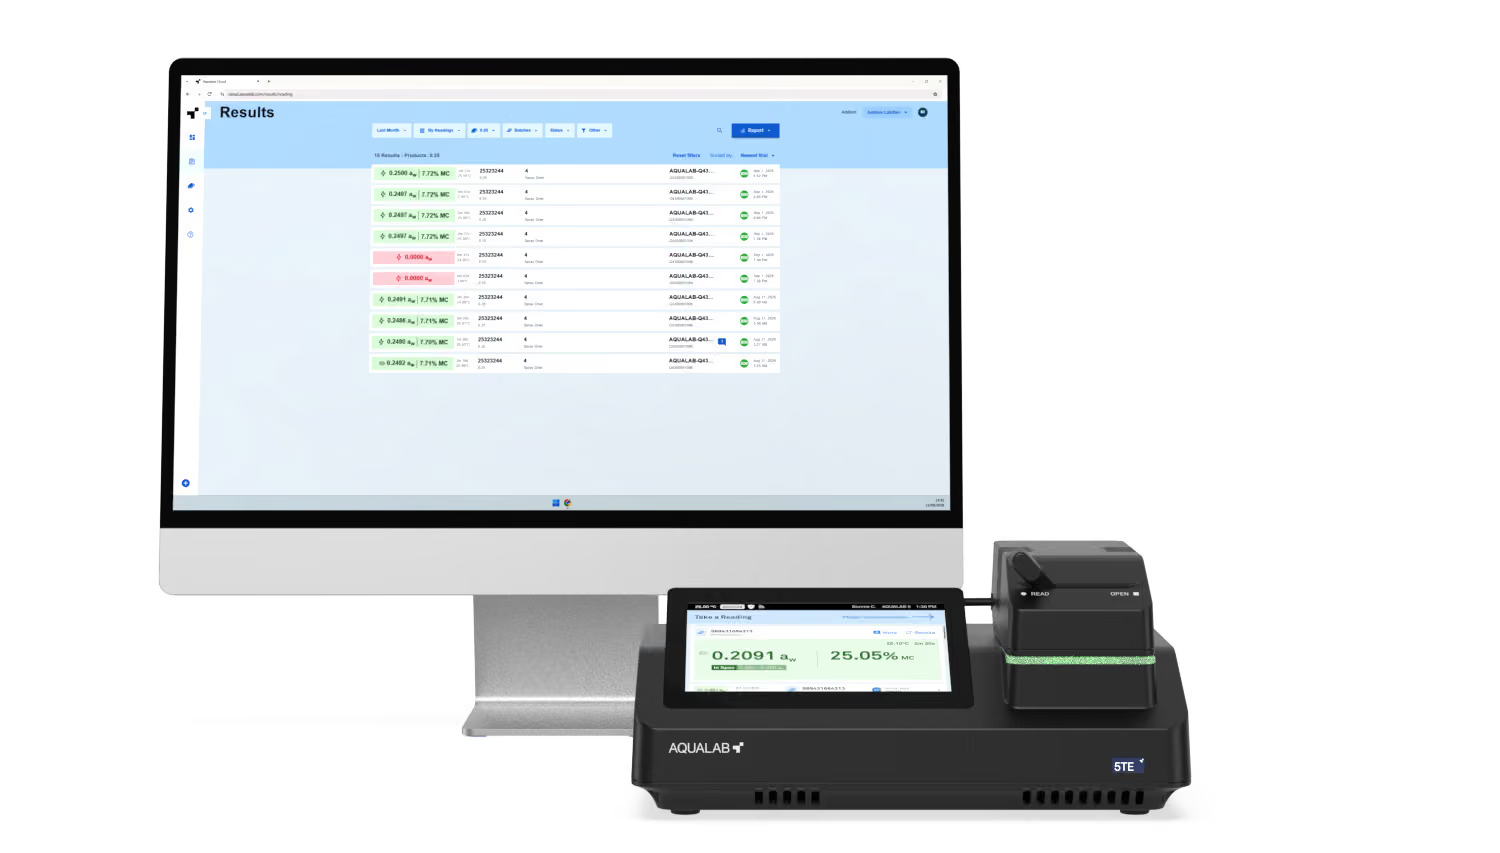
AQUALAB Cloud is the web-based companion to the AQUALAB 5TE Water Activity meter. It centralizes readings, verifications, products, and instruments across your organization, giving you secure access to your reading data from any supported web browser.
When an AQUALAB 5TE is connected to AQUALAB Cloud, readings are automatically backed up and synchronized, products and settings are shared across instruments, and advanced features such as One-Minute readings, moisture content readings, and scheduled reporting become available.
This user manual provides instructions for setting up and operating AQUALAB Cloud. It is intended to be used alongside the AQUALAB 5TE User Manual, which covers instrument operation, verification, and maintenance. Please read both manuals carefully to ensure proper operation and optimal performance.
1.1 About AQUALAB Cloud
AQUALAB Cloud is a secure, browser-based portal for managing AQUALAB reading data across one or more facilities. From AQUALAB Cloud you can:
- Review readings and results from every connected instrument
- Configure products with measurement limits and targets, moisture models, and custom fields
- Monitor instruments and their verification status
- Generate, schedule, and share reports
- Manage users, roles, and facility-wide security settings
- Maintain a complete audit trail of key actions
AQUALAB Cloud is accessed through a web browser and does not require any software installation.
1.2 Working with the AQUALAB 5TE
AQUALAB Cloud and the AQUALAB 5TE instrument are designed to work together. Connecting an instrument to the internet and linking it to an AQUALAB Cloud account enables the full feature set:
- One-Minute readings
- Moisture Content readings
- Automatic data backup
- Product and batch configuration
- Enhanced data analysis and reporting
- Synchronized settings across devices
Readings taken on a connected AQUALAB 5TE are uploaded automatically and appear in AQUALAB Cloud. Products and facility settings created in AQUALAB Cloud are synchronized to every connected instrument within the facility.

Note
Connecting an instrument and linking it to an AQUALAB Cloud account is performed during instrument onboarding. See "Initial Setup" in the AQUALAB 5TE User Manual.

1.3 System Requirements
To use AQUALAB Cloud, you need:
- An AQUALAB Cloud license
- An internet connection
- A supported web browser
License status can be viewed on the connected instrument and is managed through the AQUALAB Cloud web interface at www.cloud.aqualab.com.
1.4 Key Concepts and Terminology
The following terms are used throughout this manual.
Facility – A physical site within your company. Readings, batches, and instruments are organized by facility. A company may have one or many facilities.
Product – A configurable profile that associates readings with metadata such as reading limits and targets, custom fields, and manual tests. Products also enable moisture content and One-minute readings.
Batch – An identifier used to group readings of the same product run, supporting traceability.
Reading – A single water activity reading record. A reading may include a full water activity (aw) result, a One-minute (fast) result, and, where configured, a moisture content (%MC) result.
Verification – A check of instrument accuracy against certified water activity standards. Verification is performed on the instrument; results are recorded on the instrument and in AQUALAB Cloud.
Instrument – An AQUALAB 5TE linked to your AQUALAB Cloud account.
Role – The permission level assigned to a user.
Event Log – A facility-level audit trail of key actions taken in AQUALAB Cloud.
2. GETTING STARTED
This chapter covers creating an account, logging in, and finding your way around the interface.
2.1 Creating Your AQUALAB Cloud Account
An AQUALAB Cloud account is created during instrument onboarding. When setting up a new AQUALAB 5TE, select Create new Account on the Company Registration screen to start a free demo of AQUALAB Cloud – this is also where you'll create your facility. You will receive a welcome email with a link to log in to AQUALAB Cloud directly. See "Initial Setup" in the AQUALAB 5TE User Manual.
2.2 Logging In
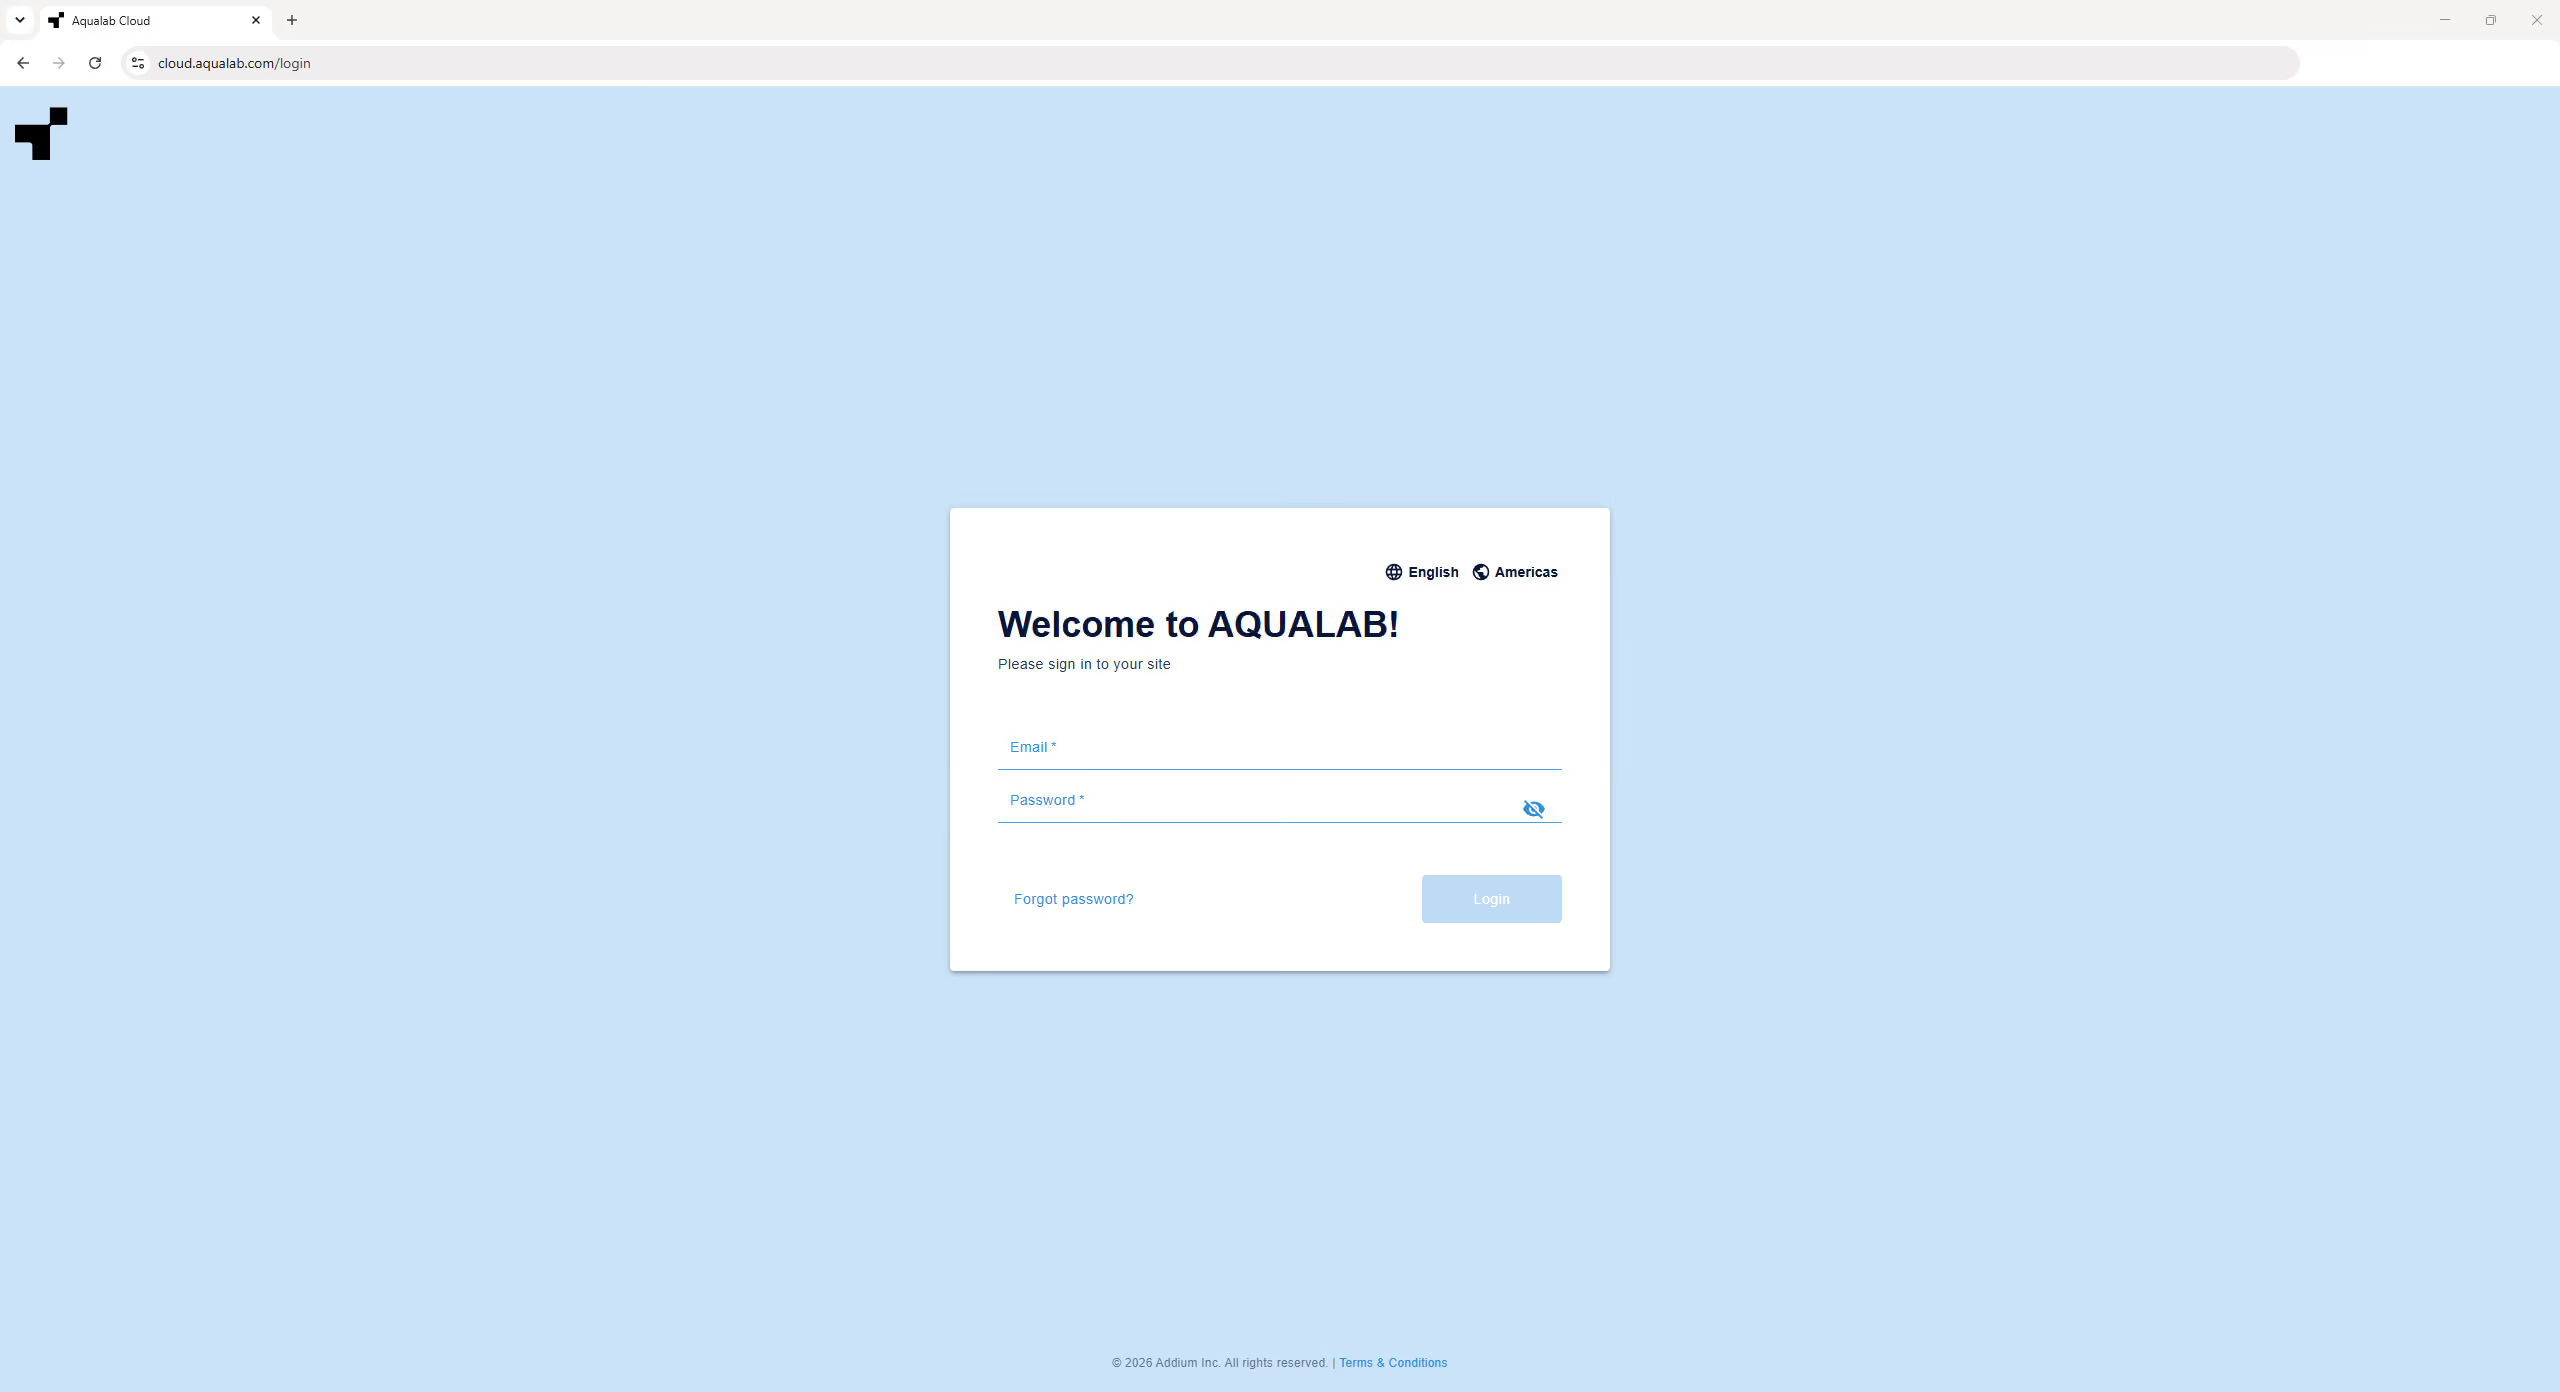
- Open a supported web browser and navigate to the AQUALAB Cloud web app at www.cloud.aqualab.com.
- Enter your email and password used in the initial account set-up.
- Select Log In.
2.3 Navigating the Interface
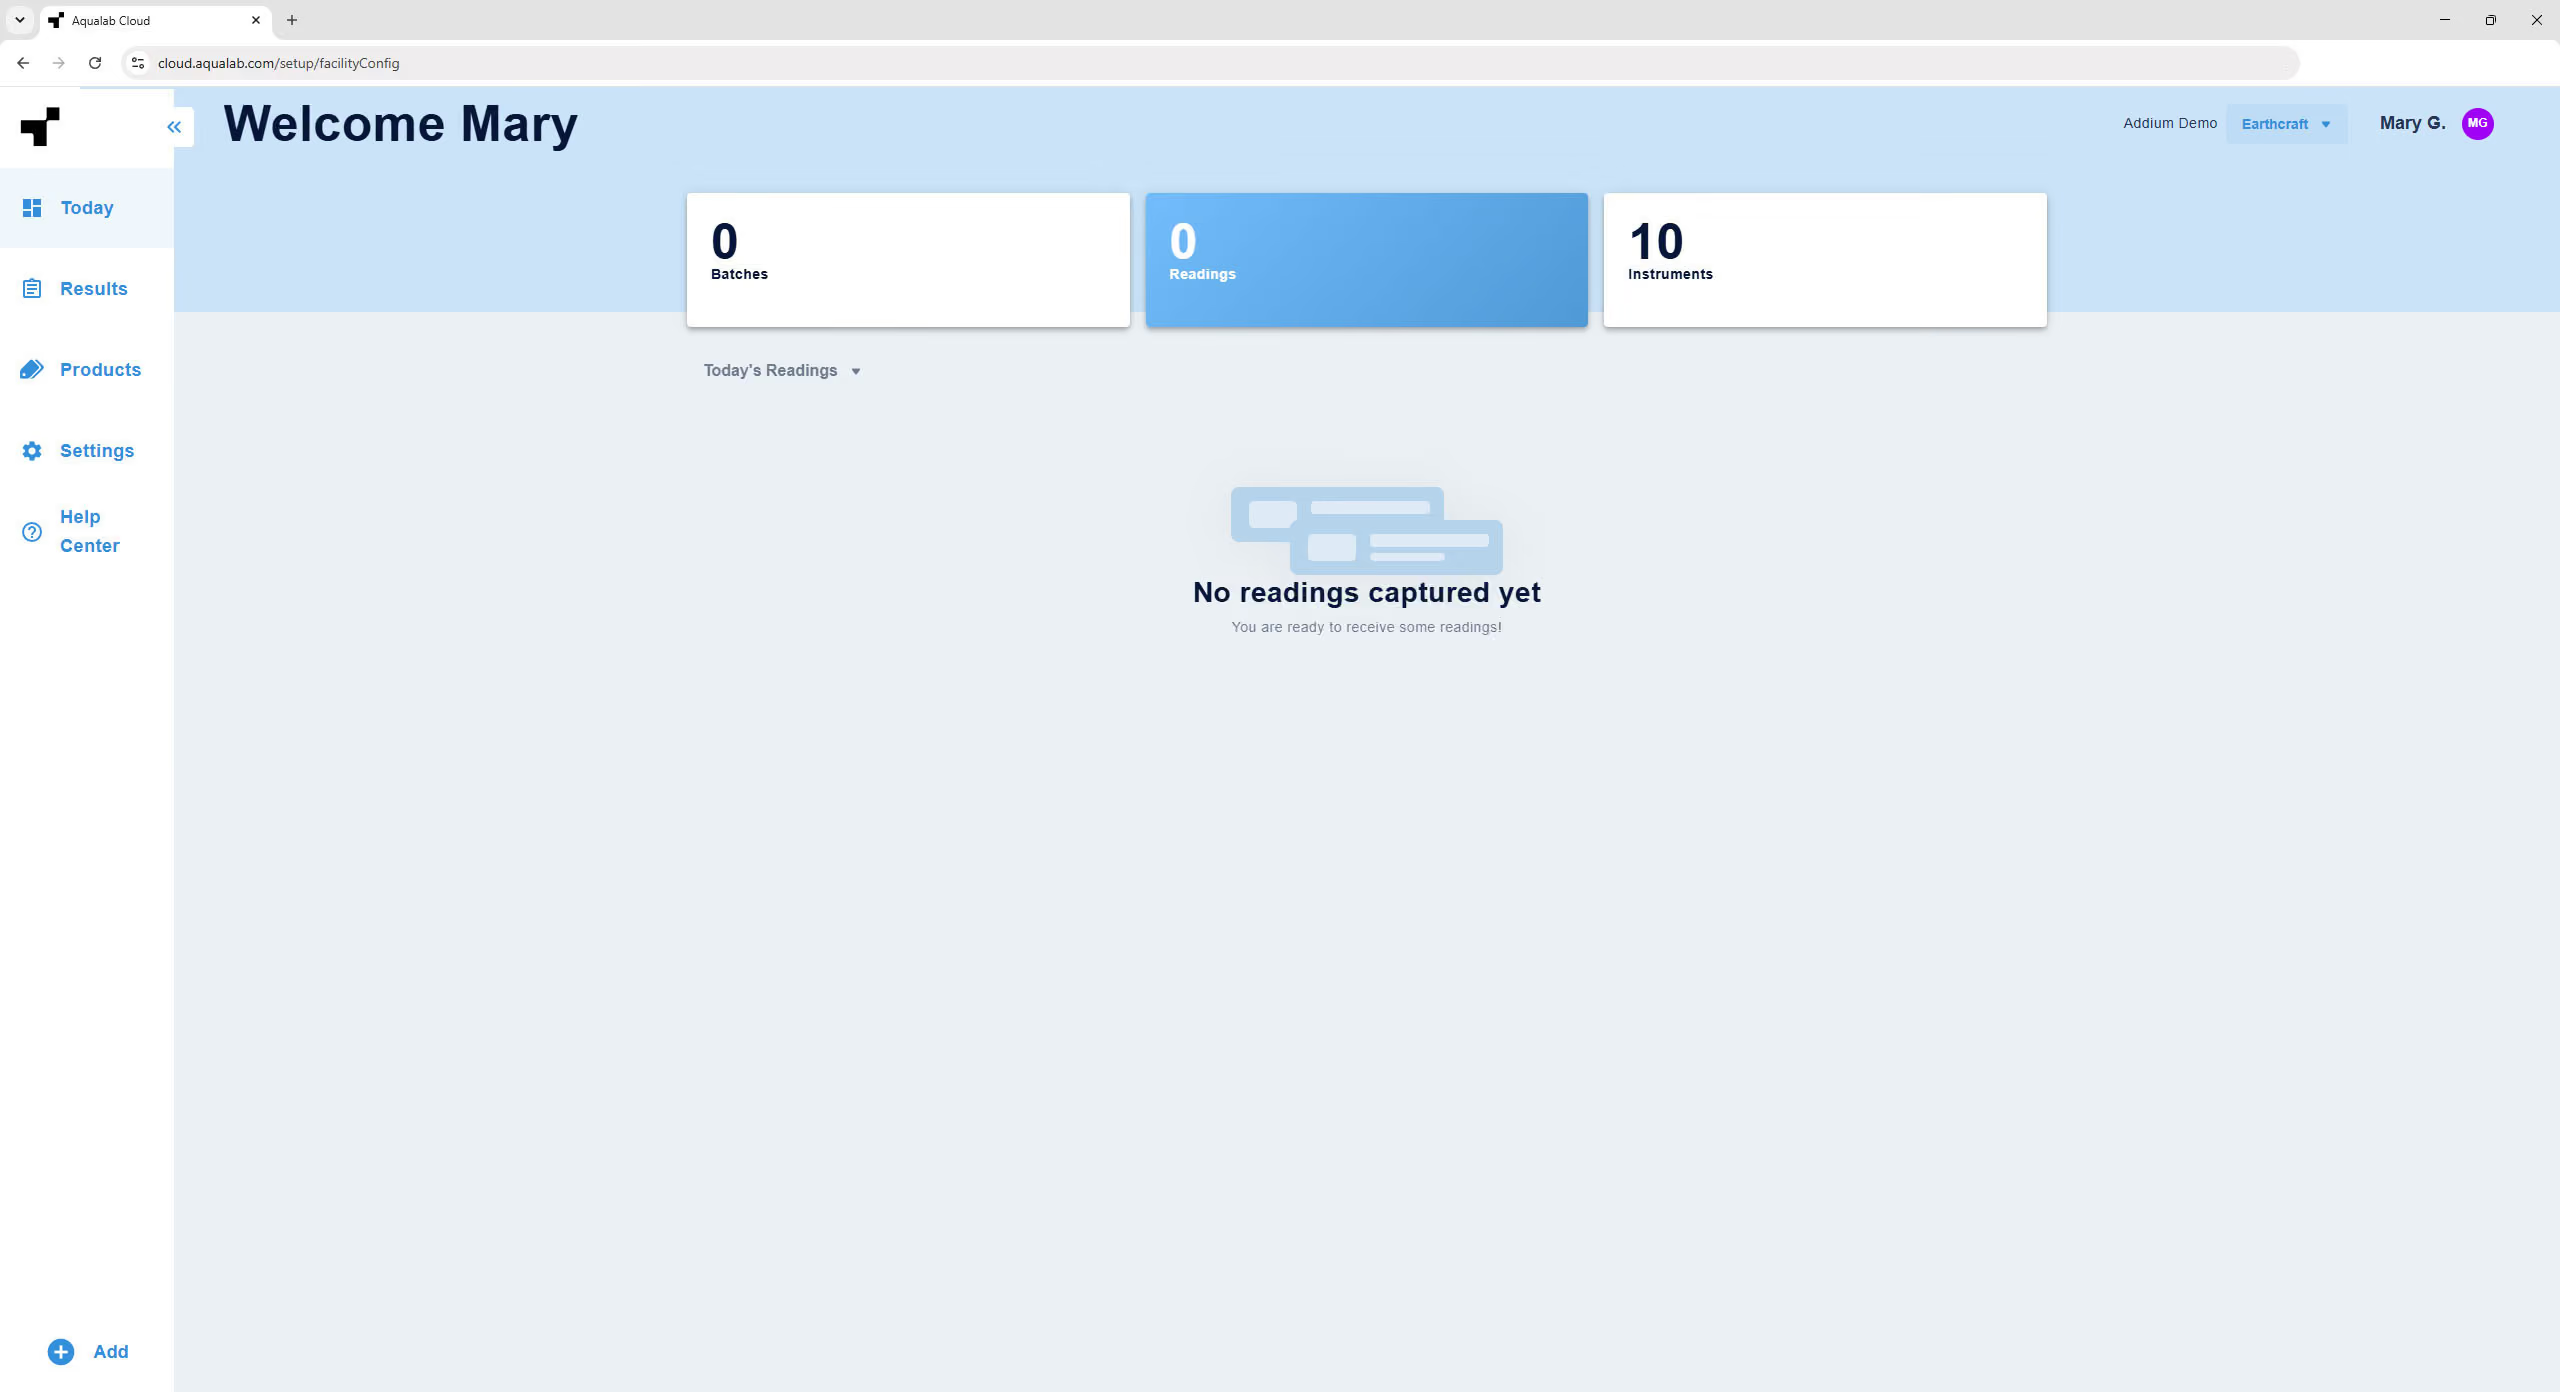
After logging in, the AQUALAB Cloud workspace is organized into three main areas.
Left menu bar – Provides navigation between the primary sections of AQUALAB Cloud: Today, Results, Products, Settings, and Help Center. The plus (+) icon at the bottom of the menu starts a manual reading (see Chapter 7).
Top banner – Displays your company name and, to its right, the current facility. Admin users can use the facility selector to switch between facilities or create a new one; Technician users see the facility name only (see Chapter 5).
User menu – In the upper-right corner, the logged-in user's name and avatar are shown. Selecting it opens a menu with options to view your Profile and Account, and to Log Out. Available options depend on your role.
Facility Selector – If more than one facility has been setup, users can switch between them using the facility selector in the top right corner of the screen.
3. SETTINGS
Settings centralizes administrative configuration for AQUALAB Cloud. Most settings require the Admin role.
3.1 Overview
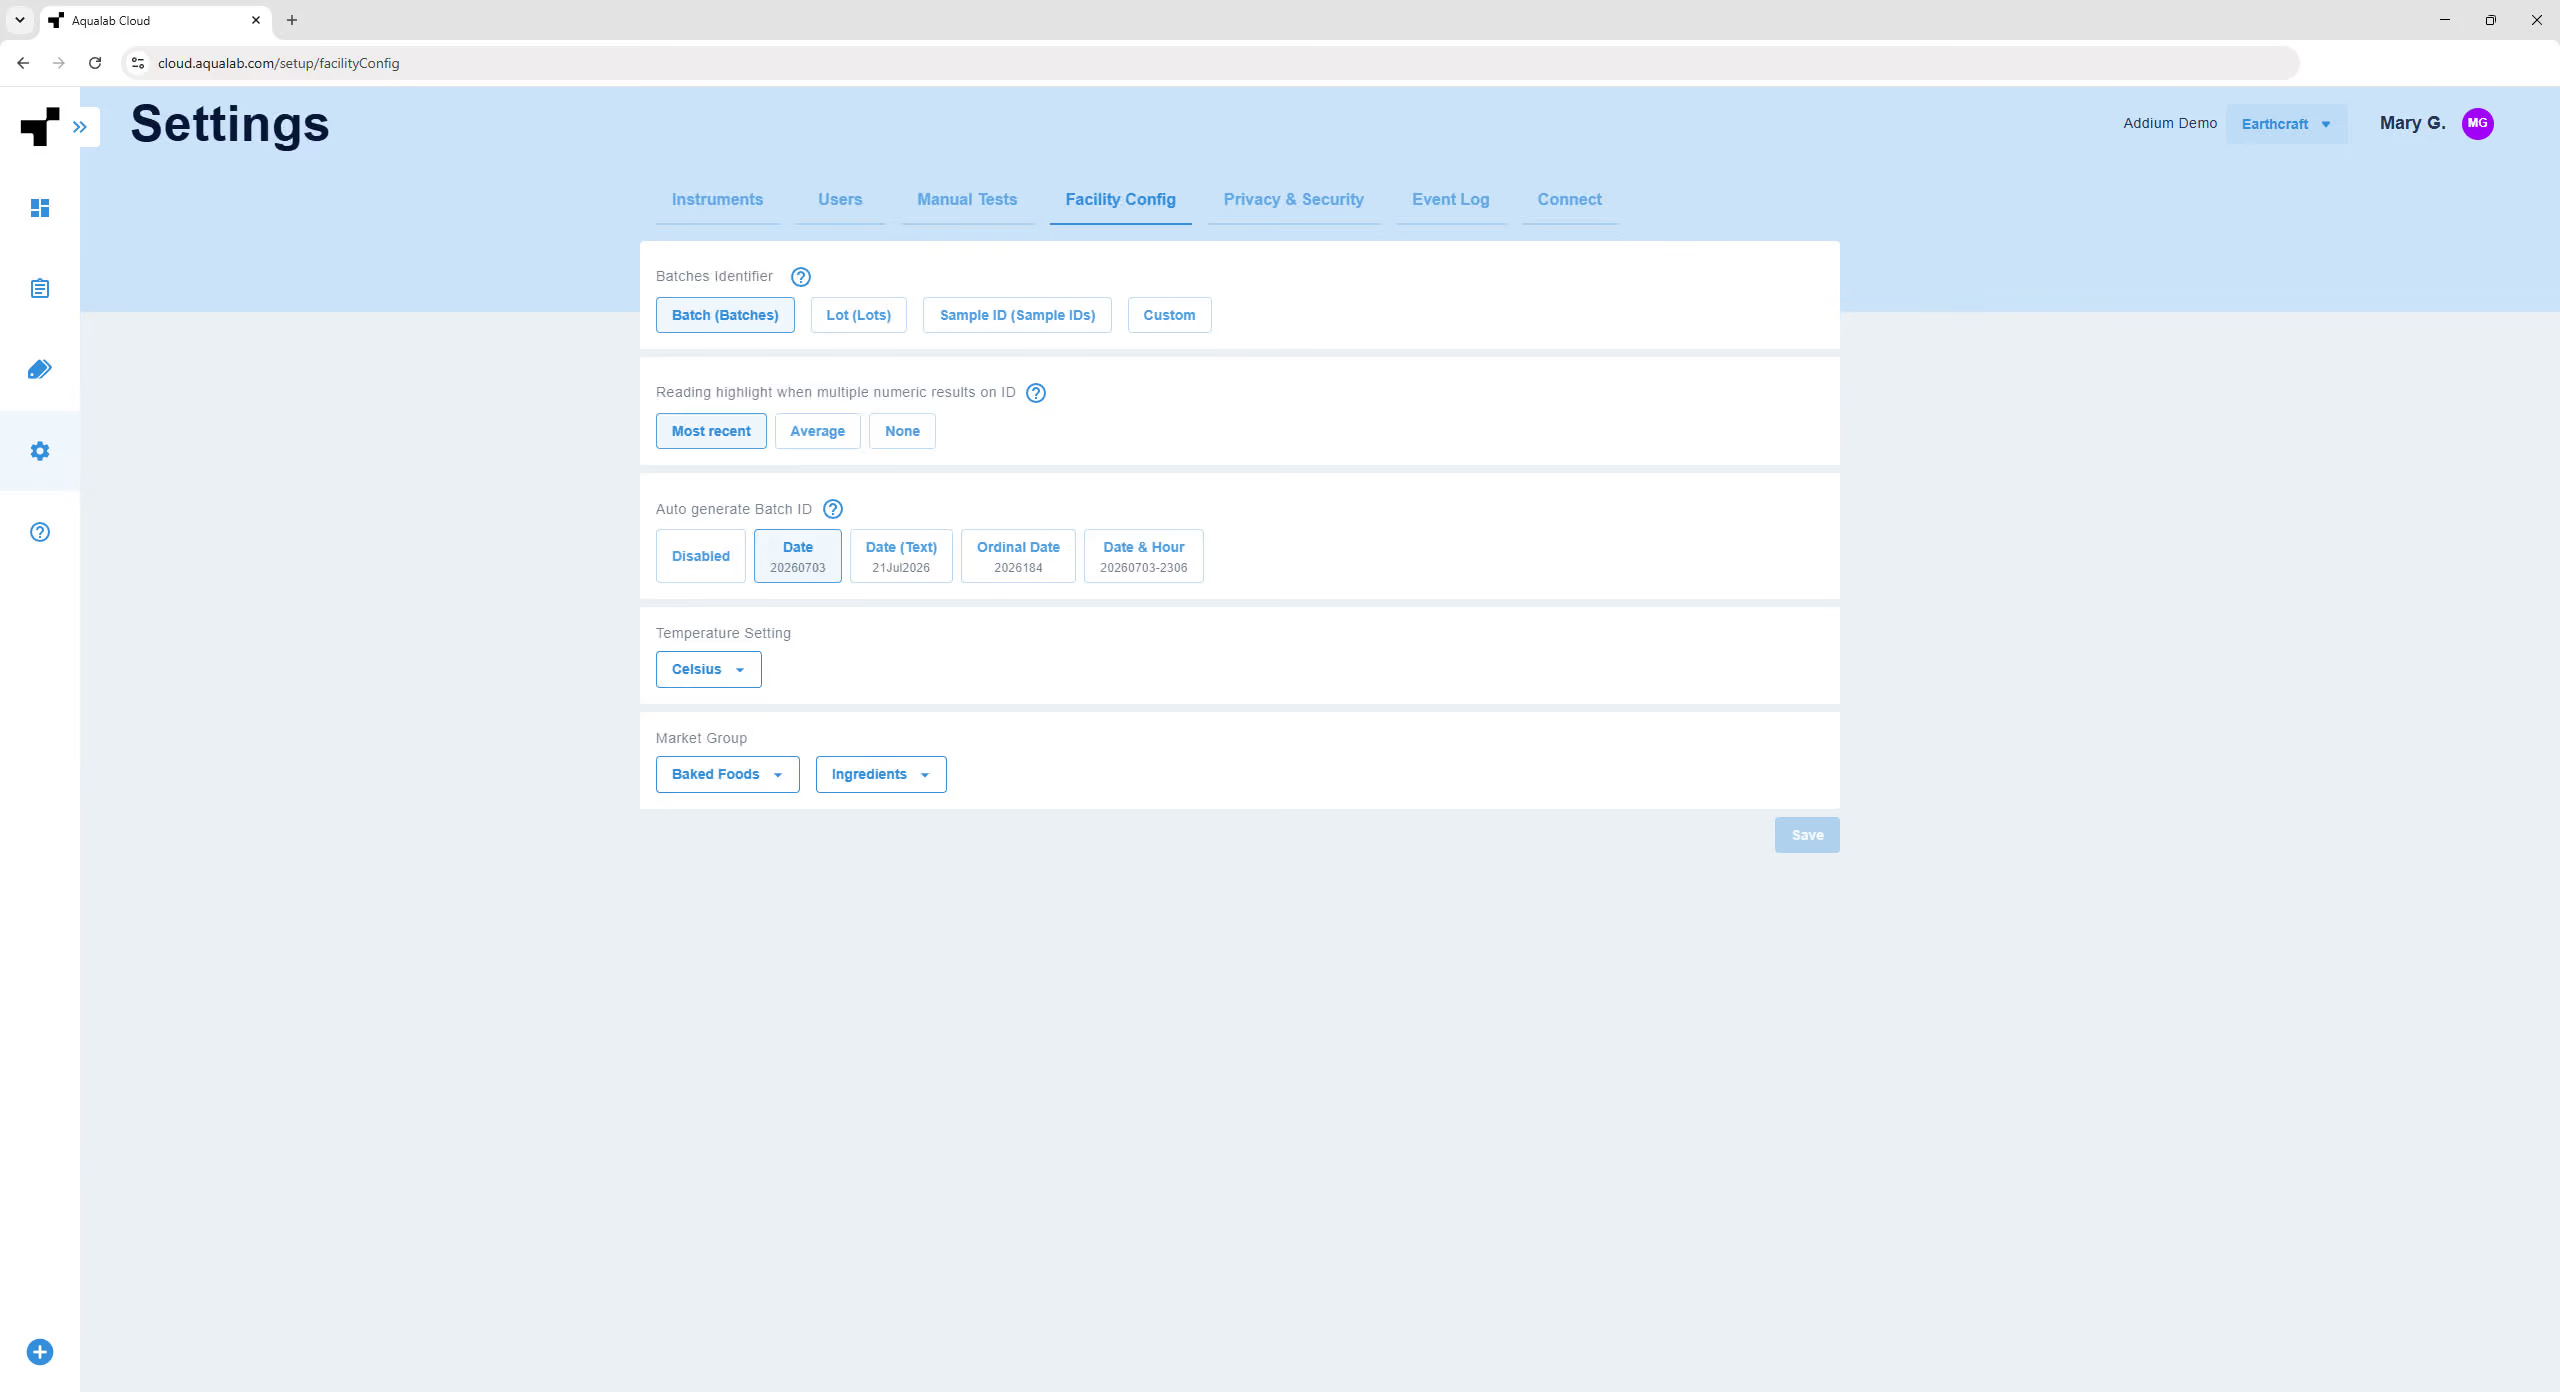
Open Settings from the left menu. The available tabs are Instruments, Users, Manual Tests, Facility Config, Privacy & Security, Event Log and Connect.
3.2 Instruments
View and configure instruments and review their verification history. See Chapter 10.
3.3 Users
Add and manage users and roles. See Chapter 8 (User Management).
3.4 Manual Tests
Maintain the facility's manual test library. Active tests are listed alphabetically and can be duplicated or archived. To add a manual test, provide:
- Title (required)
- Test method – describes how the sample is tested
- Test standard – selected from a predefined list or defined as a custom text, numeric, or multiple-choice
- Instructions – optionally include a short work instruction
- URL – optionally include a link
Predefined manual tests include Brix, Fat, Solids, Salt, Ash, Protein, pH, and Millijoules. Selecting a test opens its details, where the instructions can be replaced, the test previewed, or the test archived.
3.5 Facility Configuration
A company can have one or many facilities within AQUALAB Cloud. Readings, batches, and instruments belong to a specific facility. Facility settings such as instrument configuration and batches are synchronized across the instruments in that facility. Products are specific to each facility.
- Batch identifier – choose how readings are grouped: Batch, Lot, Sample ID, or a custom term (with singular and plural names).
- Reading highlight data – controls which reading is shown on the batch summary when a batch contains multiple readings. Select Most recent to always show the latest reading, which is useful when monitoring how a batch changes over time. Select Average to show the mean of all readings, which is useful when the overall batch result matters more than any individual measurement. Select None to show no aggregate value.
- Auto-generate batch ID – when enabled, choose a format: Date, Date (Text), Ordinal Date, or Date & Hour. When disabled, batch identifiers are entered manually.
- Temperature Setting – set the temperature unit (Celsius or Fahrenheit).
- Market groups – select up to two market groups used for moisture content readings. The list of available standard isotherm models updates accordingly.

Caution
Unselecting a market group means new readings for products associated with that market group will no longer include moisture content.
3.6 Privacy & Security
- Auto logout time – set the period of inactivity before users on instruments are automatically logged out: 1 minute, 15 minutes (default), 1 hour, or No auto logout.
- Password and PIN expiration – set when passwords and PINs automatically expire: 90 days, 180 days, 365 days, or No expiration.
3.7 Event Log
The Event Log records key facility actions for traceability and security. Each entry lists the Date & Time, the User responsible, the device (if applicable), the Event type, and a Description that lists each modified attribute with its previous and updated values. Entries are sorted newest first and can be searched and filtered.
3.8 Connect
The Connect tab allows you to link a legacy SKALA Cloud account to AQUALAB Cloud, so that data collected in SKALA Cloud continues to be accessible alongside new readings going forward. Once the connector is set up, data syncs automatically, once an hour.
Note: A SKALA Control customer site can only be imported into one AQUALAB Cloud facility. If this site has already been imported, it cannot be imported again.
4. PRODUCTS
Products associate readings with metadata and enable moisture content and One-minute readings. Products require an AQUALAB Cloud license seat and are created and edited in the web interface.
4.1 About Products
A product defines reading limits and targets, an optional isotherm model enabling moisture content readings, custom fields, and manual tests. Each product requires a unique name and synchronizes to all connected instruments in the facility.
Note
Products cannot be deleted once one or more readings have been recorded. Instead, products are archived. Archived products are removed from selection for new readings, but their historical readings remain accessible.
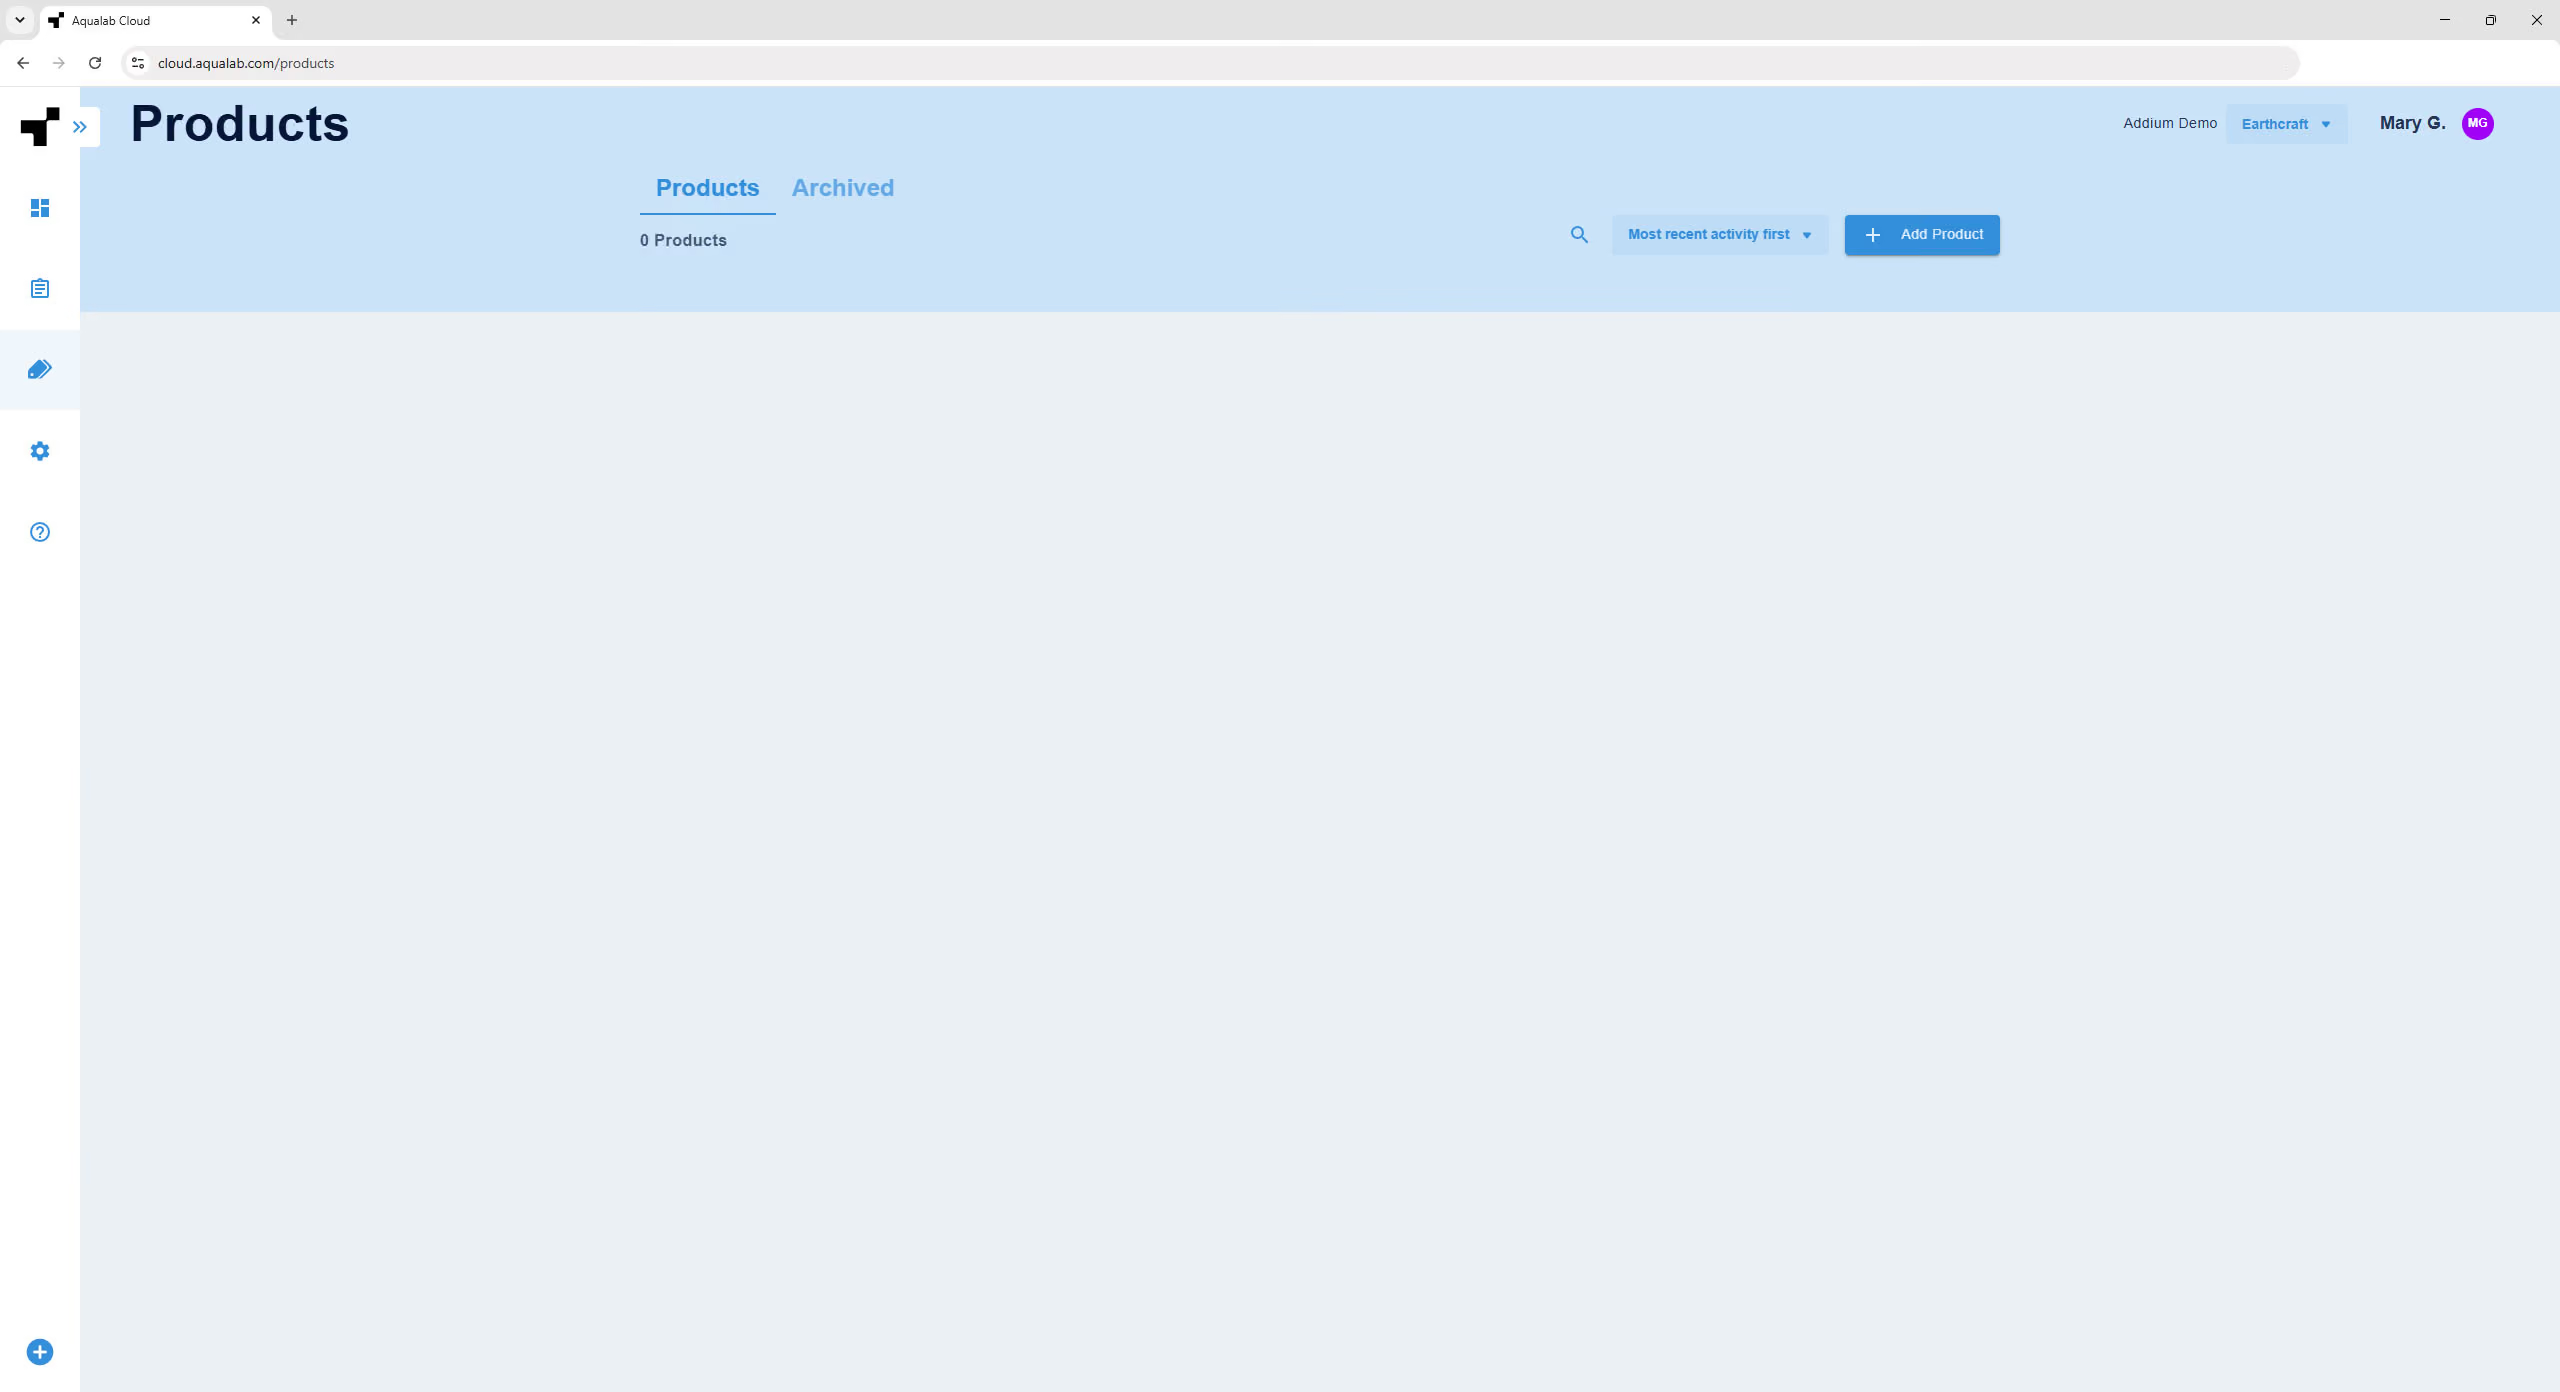
4.2 Creating a Product
4.2.1 Initiate Product Creation
Open Products and select
 .
.
Follow the on-screen setup wizard by entering a unique product name and completing the three-panel wizard – Instrument Tests, Manual Tests, and Custom Fields – shown as a carousel:
4.2.2 Instrument Tests
Choose the instrument test type for the product:
- Water Activity (aw) – water activity only
- Water Activity (aw) & Moisture Content (MC) – water activity and moisture content
- Skip – no instrument tests are performed for this product
When water activity is enabled, One-Minute readings are enabled by default. When moisture content is enabled, select an isotherm model – a standard isotherm model from your facility's market groups, or a custom model – and view or edit its MC offset.
Set optional test limits using the upper and lower limit and target fields. Water activity ranges from 0 to 1 aw; moisture content ranges from 0 to 100 %MC. You can clear an individual range or clear all ranges.
Note
The MC offset aligns AQUALAB moisture content results with a reference method.
If no readings have been taken with the selected moisture model, take a reading with that model on the instrument first; the offset cannot be calculated until then.
Otherwise, select Find reading in AQUALAB Cloud and choose a prior reading taken with that model. Enter the reference reading – the same sample measured by another moisture content method – and select Calculate Offset.
The offset is calculated as the difference between the reference %MC and the AQUALAB %MC, and is populated into the product.
4.2.3 Manual Tests
Add manual tests that are recorded by hand rather than measured by the instrument (for example, Brix or pH). Manual tests are drawn from your facility's manual test library (see Section 3.4).
4.2.4 Custom Fields
Add up to three custom fields, in any combination and order, to be captured each time a reading is taken. Custom field inputs can be as:
- Free text / barcode
- Multiple choice
- Automatic sample numbering
4.2.5 Finish Product Creation
Select
 to complete the product creation.
Once saved, the product is automatically synced to all connected AQUALAB 5TE instruments within a facility.
4.3 Editing, Duplicating, and Archiving Products
From the Products list, select the ••• menu next to a product to edit, duplicate, or archive it. Editing a product uses the same panels as creation.
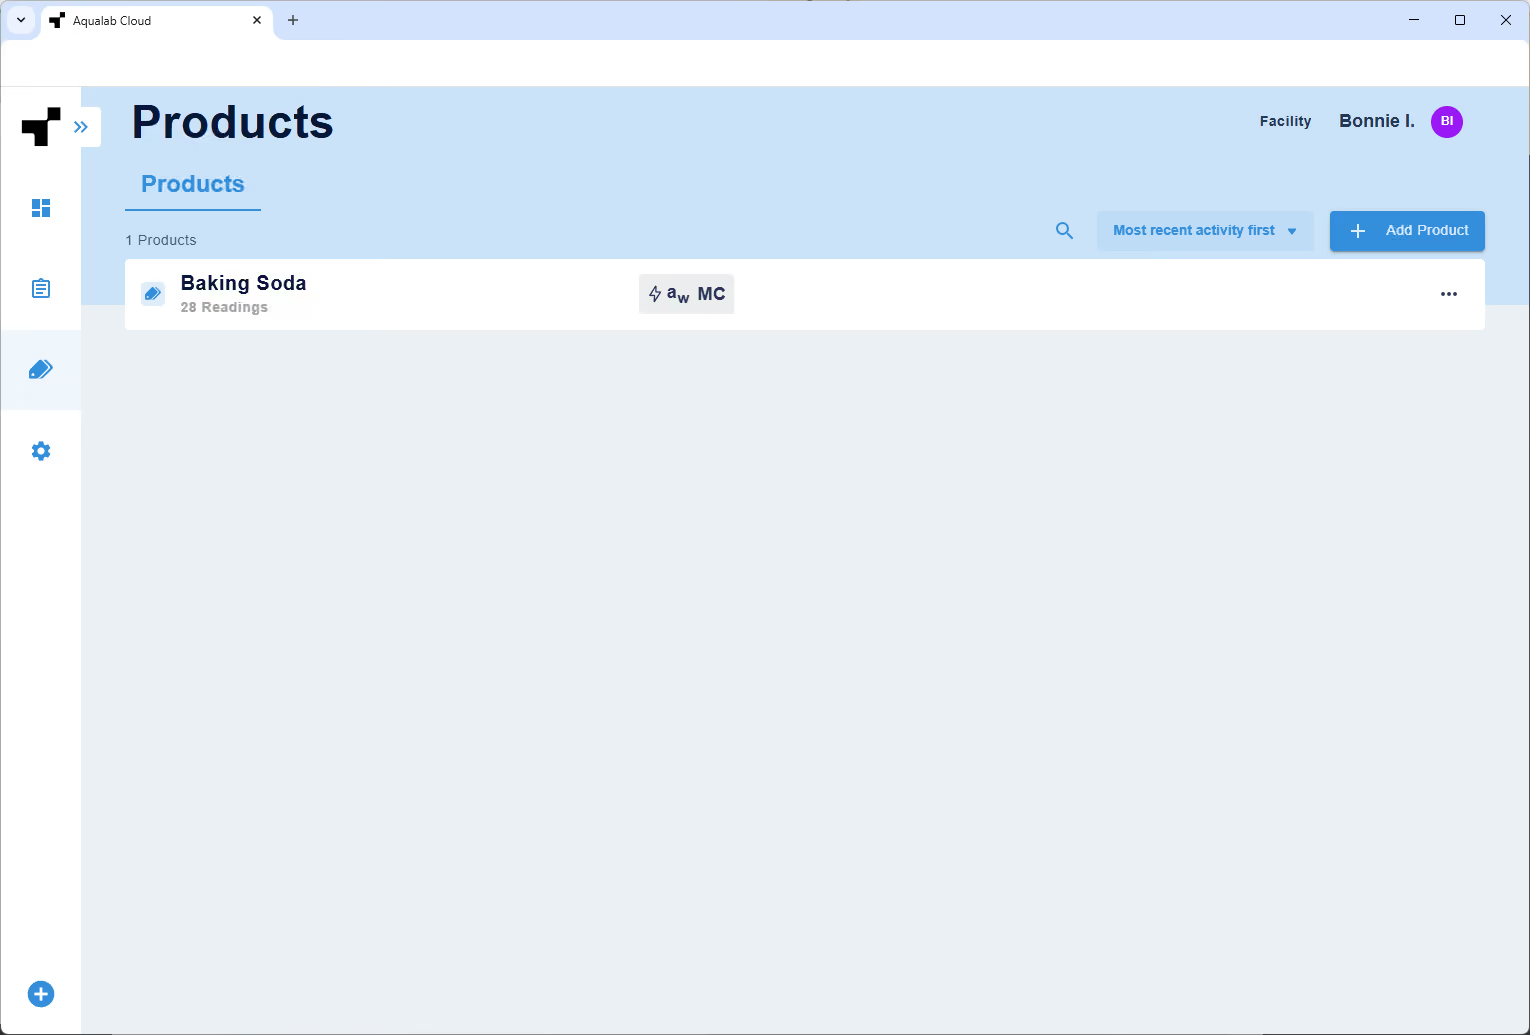
4.4 Products Screen
The Products screen shows the complete list of available products. Selecting a product shows additional information, such as the number of readings recorded and the timeframe during which the product has been used.
NOTE
Readings cannot be started from the Products screen. Use Take a Reading from the Home screen and select the product from there.
5. Readings and Batches
5.1 How Readings Reach AQUALAB Cloud
Readings taken on a connected AQUALAB 5TE upload automatically and appear in Today: Readings and in Results. For instrument-side procedures, see "Take a Reading" in the AQUALAB 5TE User Manual.
5.2 Working with Batches
A batch groups readings from the same product run to support traceability. The grouping term – Batch, Lot, Sample ID, or a custom term – is set for each facility (see Section 3.5). Batch identifiers can be entered manually or generated automatically.
5.3 Taking a Manual Reading
Manual readings record results measured outside the instrument.
- Select the plus (+) icon at the bottom of the left menu bar. The manual-readings menu lists the manual readings belonging to active products.
- Select a manual reading and follow the prompts.
You can also add a manual reading to a specific batch from its card in Today: Batches.
Note
If no manual readings are available, a message directs you to create one under Settings > Manual Tests (see Section 3.4).
5.4 Adding Notes
Open a reading's detail card and add a note from the notes section. Each note is stamped with its author and date. Existing notes cannot be edited or deleted.
5.5 Voiding a Reading
From a reading's detail card, select Void to mark the reading as voided. Voided readings are shown in grey; their notes can still be viewed and added to.
Caution
Voiding cannot be undone. After a reading is voided, the control is renamed "Voided" and is disabled. The original record is preserved for traceability.
6. Results
Results provides the complete history of every reading saved to AQUALAB Cloud, not just those from the current day.
6.1 Viewing Results
Results displays a list of all readings for the time range defined by your filters. The list can be sorted by reading, by product, or by batch. The total number of readings matching your filters is shown above the list.
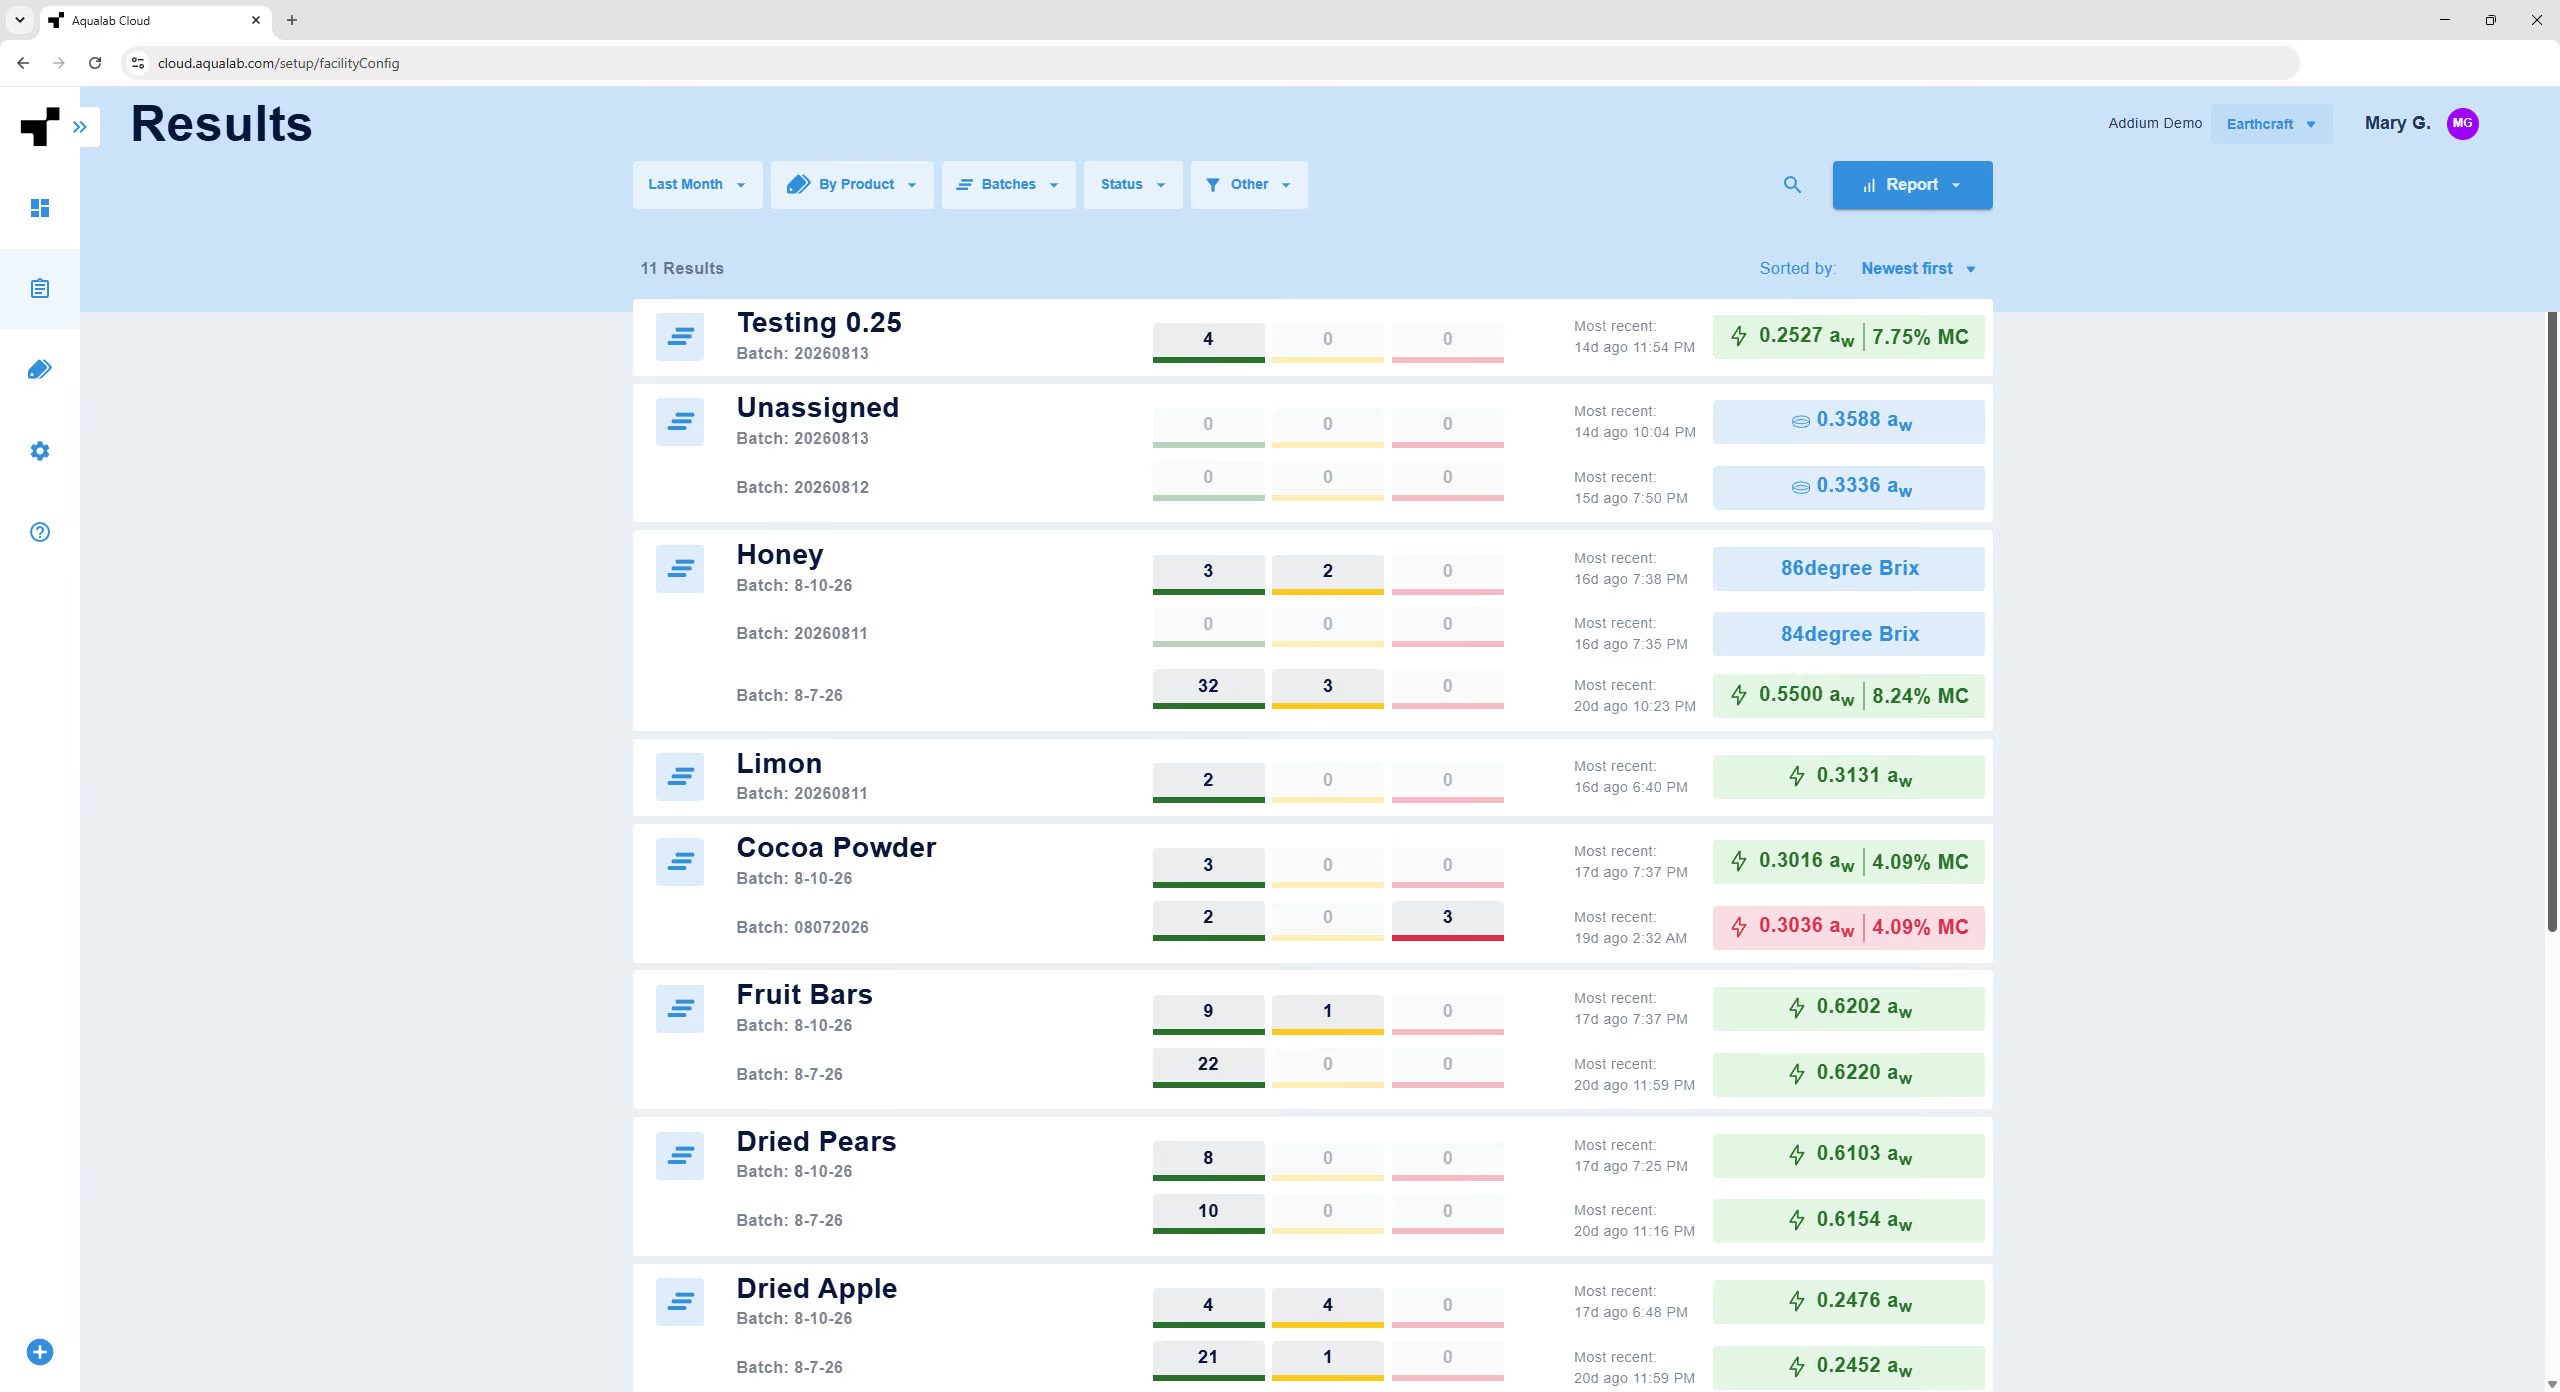
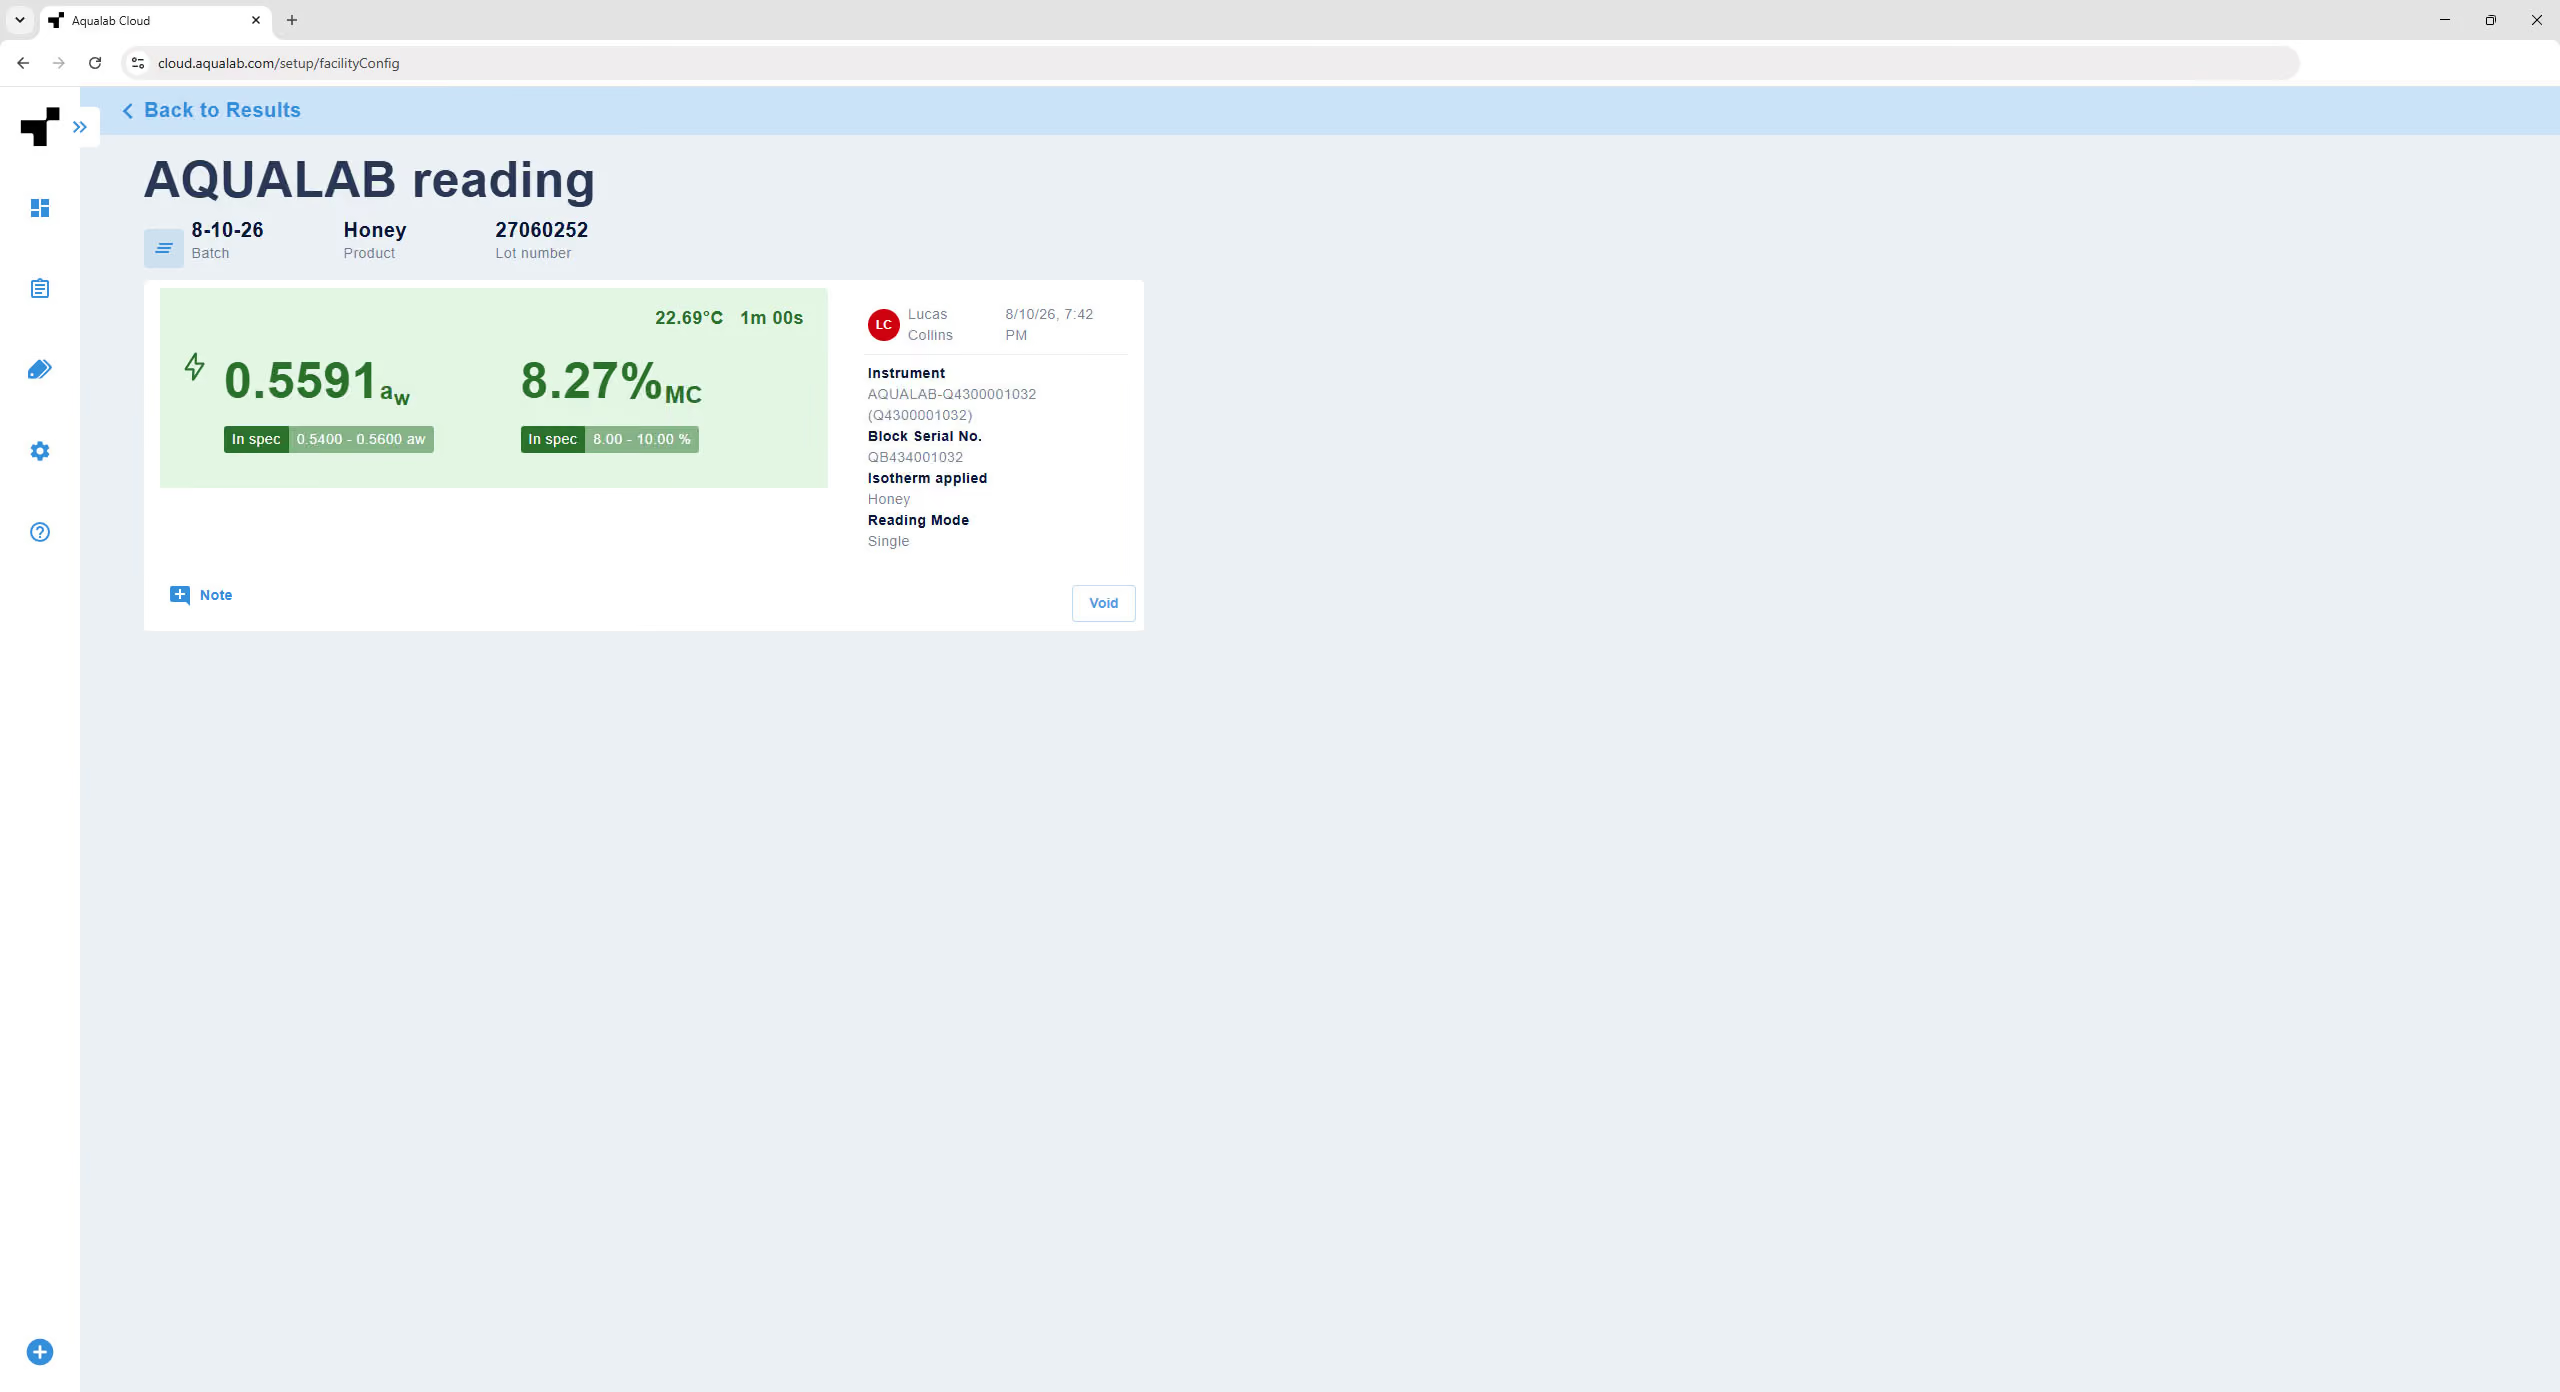
Selecting any reading card opens its detail view, which shows:
- The batch ID, product name, and any custom fields
- If applicable, the One-Minute reading result including temperature and reading duration
- The reading result includes the sample temperature and reading duration. Metadata such as: the user who performed the reading; the date and time; for AQUALAB readings, the instrument name / serial number; the Isotherm Model applied (if applicable); and the reading mode used
- Notes, with the author and date, and an option to add a new note
- An option to void the reading (see Chapter 5)
6.2 Filtering
The following filters are available at the top of the screen. (Not all options are available in all viewing configurations):
- Date Range – Last 5 Hours, Today, Last 24 Hours, Last 3 Days, Last 7 Days, Last 2 Weeks, Last Month, or a custom date range
- By – By Product, By Batch, or Individual Readings
- Products – By all products or selected products
- Batches – By all batches or selected batches
- Status – All, No limits, Passed (in-spec), Out of Target, Failed (Out of spec)
- Other – Allows to filter by test type, custom fields, instrument, and users
6.3 Searching
Use the Search function to find readings by any parameter. While searching, the filters collapse to an icon and results list as you type. Clear the search field to restore the full list.
6.4 Sorting
The following result sort options are available on the right, above the results, options may vary based on selected filters and facility configuration:
- Newest first
- Oldest first
- Batch or Lot ID: A-Z
- Product: A-Z
- User: A-Z
- Instrument: A-Z
7. THE TODAY DASHBOARD
The Today dashboard gives an at-a-glance view of the current day's activity. It is organized into three views – Readings, Batches, and Instruments – reached from the summary cards at the top of the page.
7.1 Today: Readings
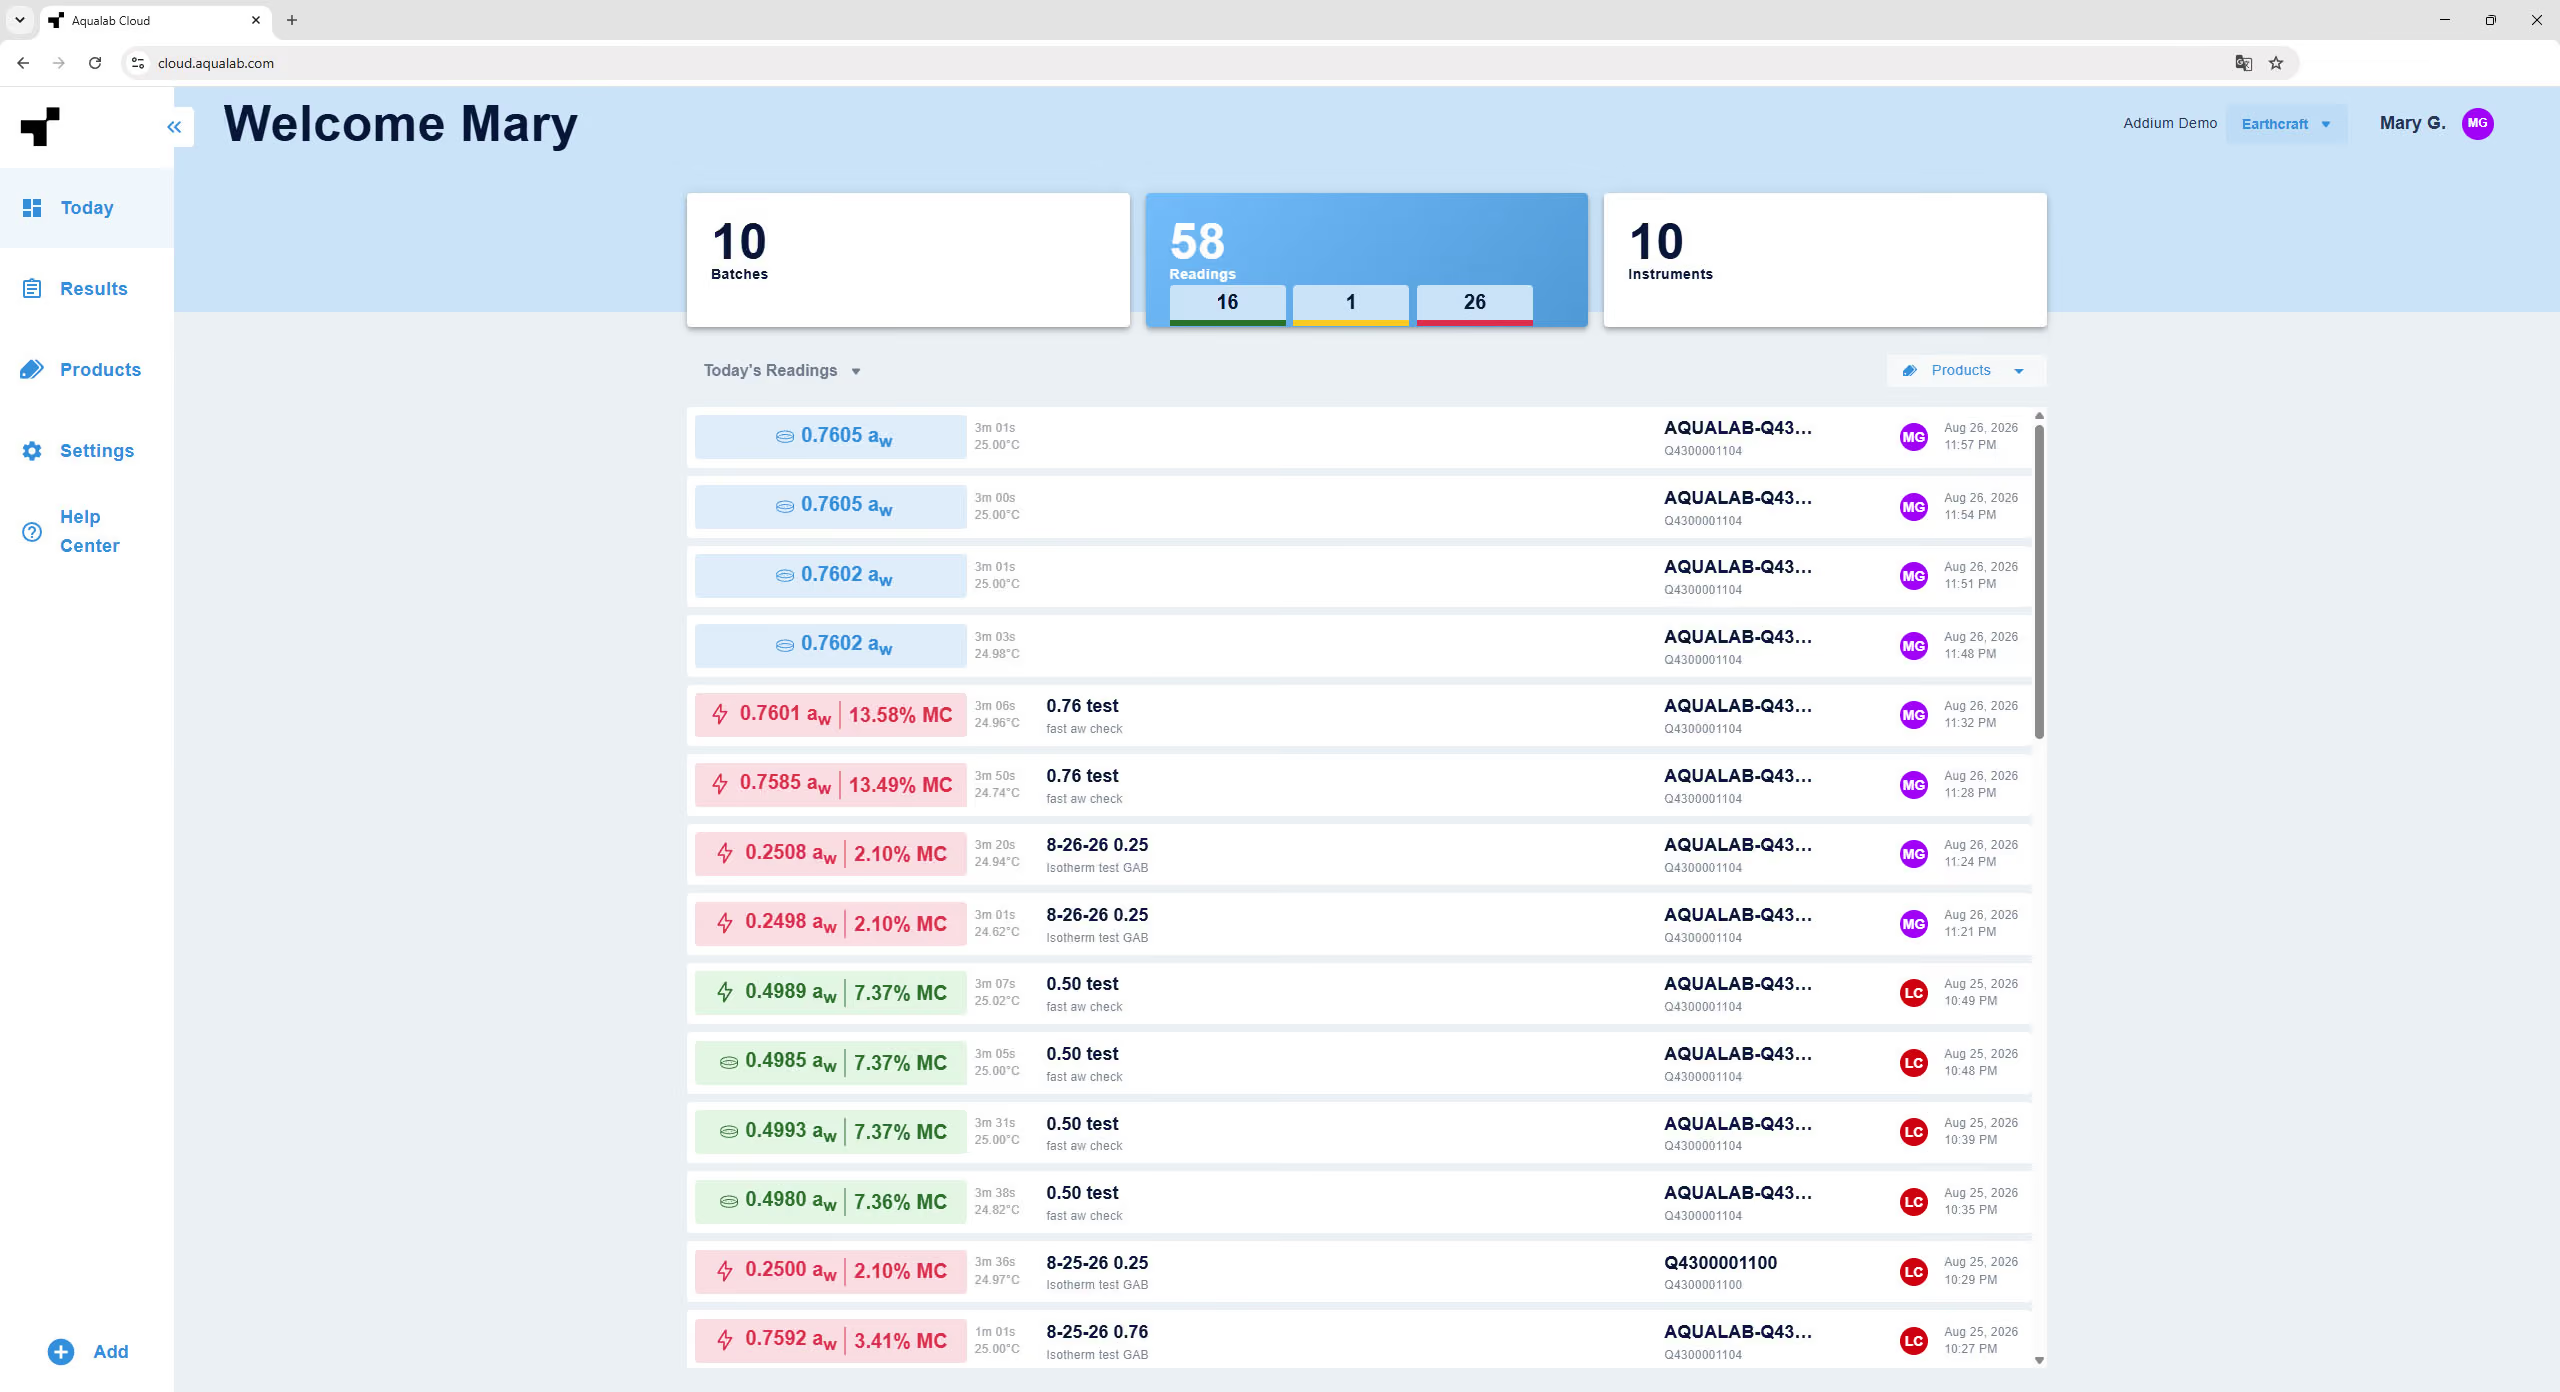
Today: Readings lists the readings taken today, most recent first. The list is scrollable. For water activity readings, each reading card shows:
- Reading type and result
- Reading duration and sample temperature
- Batch identifier and product name
- Custom fields
- Instrument name and device ID
- If applicable, a notes icon, with a count of attached notes
- The user's avatar
- the date and time of the reading
A product filter appears above the list when readings come from more than one product. If no readings have been taken today, an empty state is shown.
7.2 Today: Batches
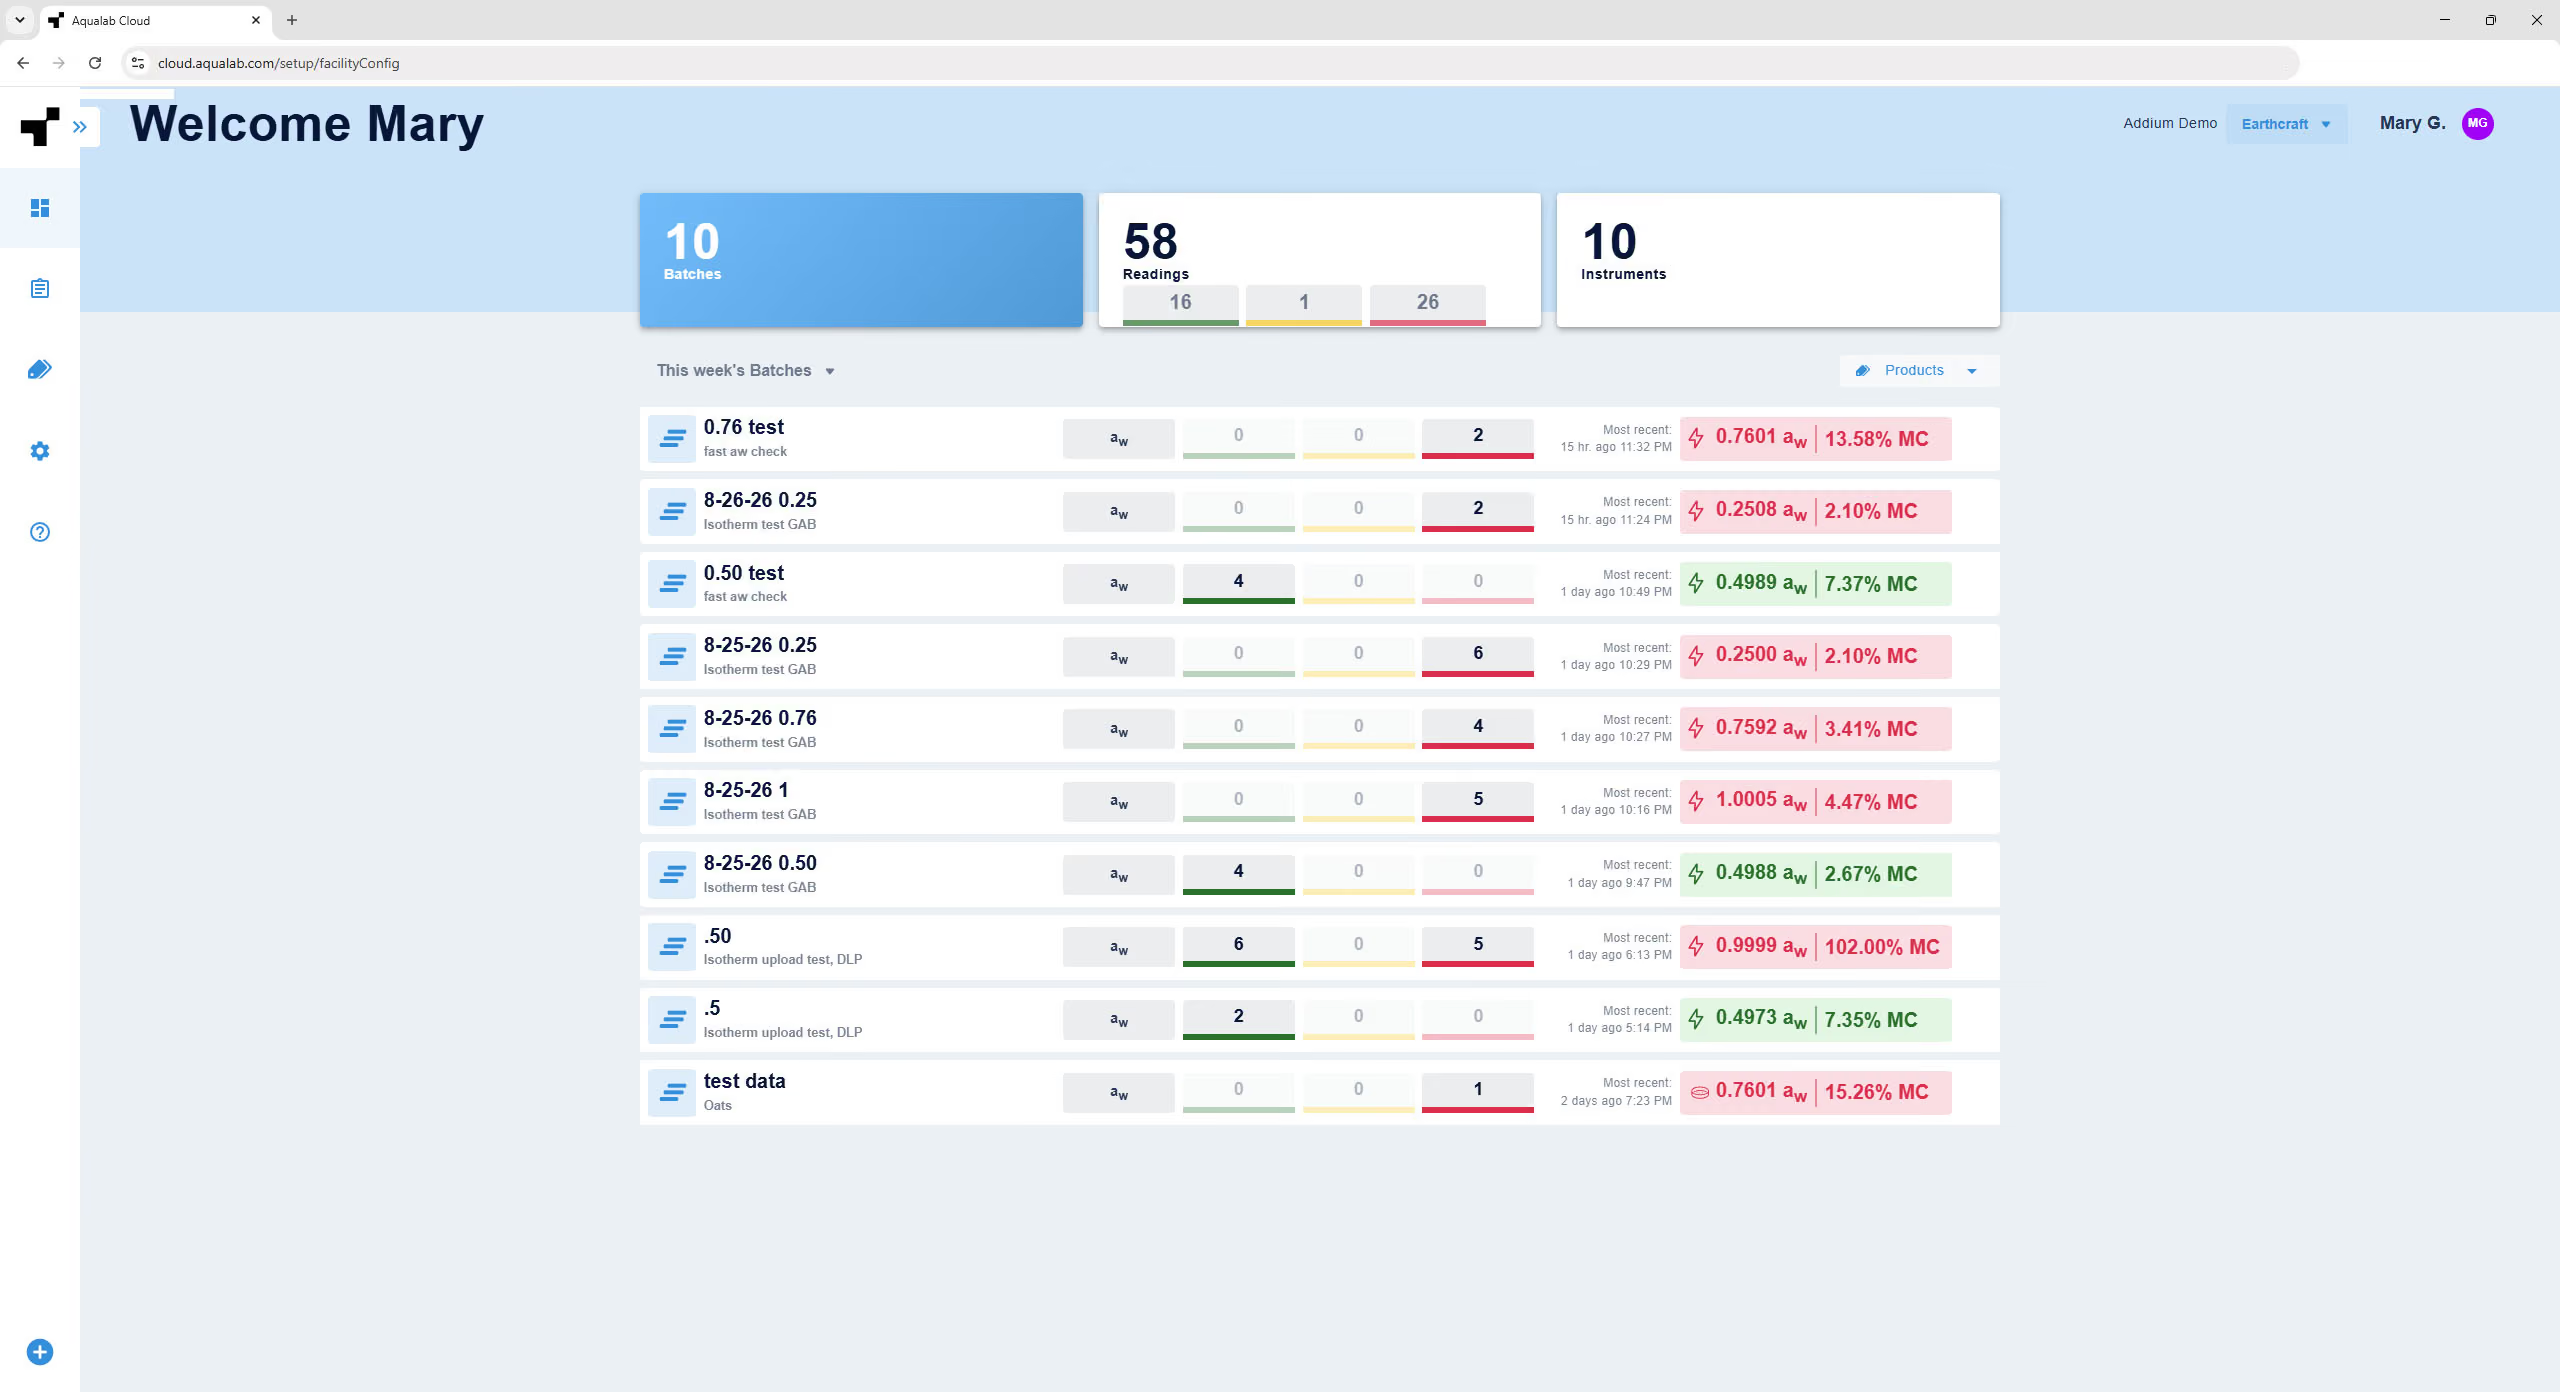
Today: Batches lists the batches run today, most recent first. Each batch card shows:
- The batch identifier, and product name
- The number of in-spec, out-of-target, and out-of-spec readings
- The most recent reading time and result
A plus (+) icon for each manual reading type lets you add a manual reading to that batch (see Chapter 5). A product filter appears when batches come from more than one product. Selecting a batch opens its readings.
7.3 Today: Instruments
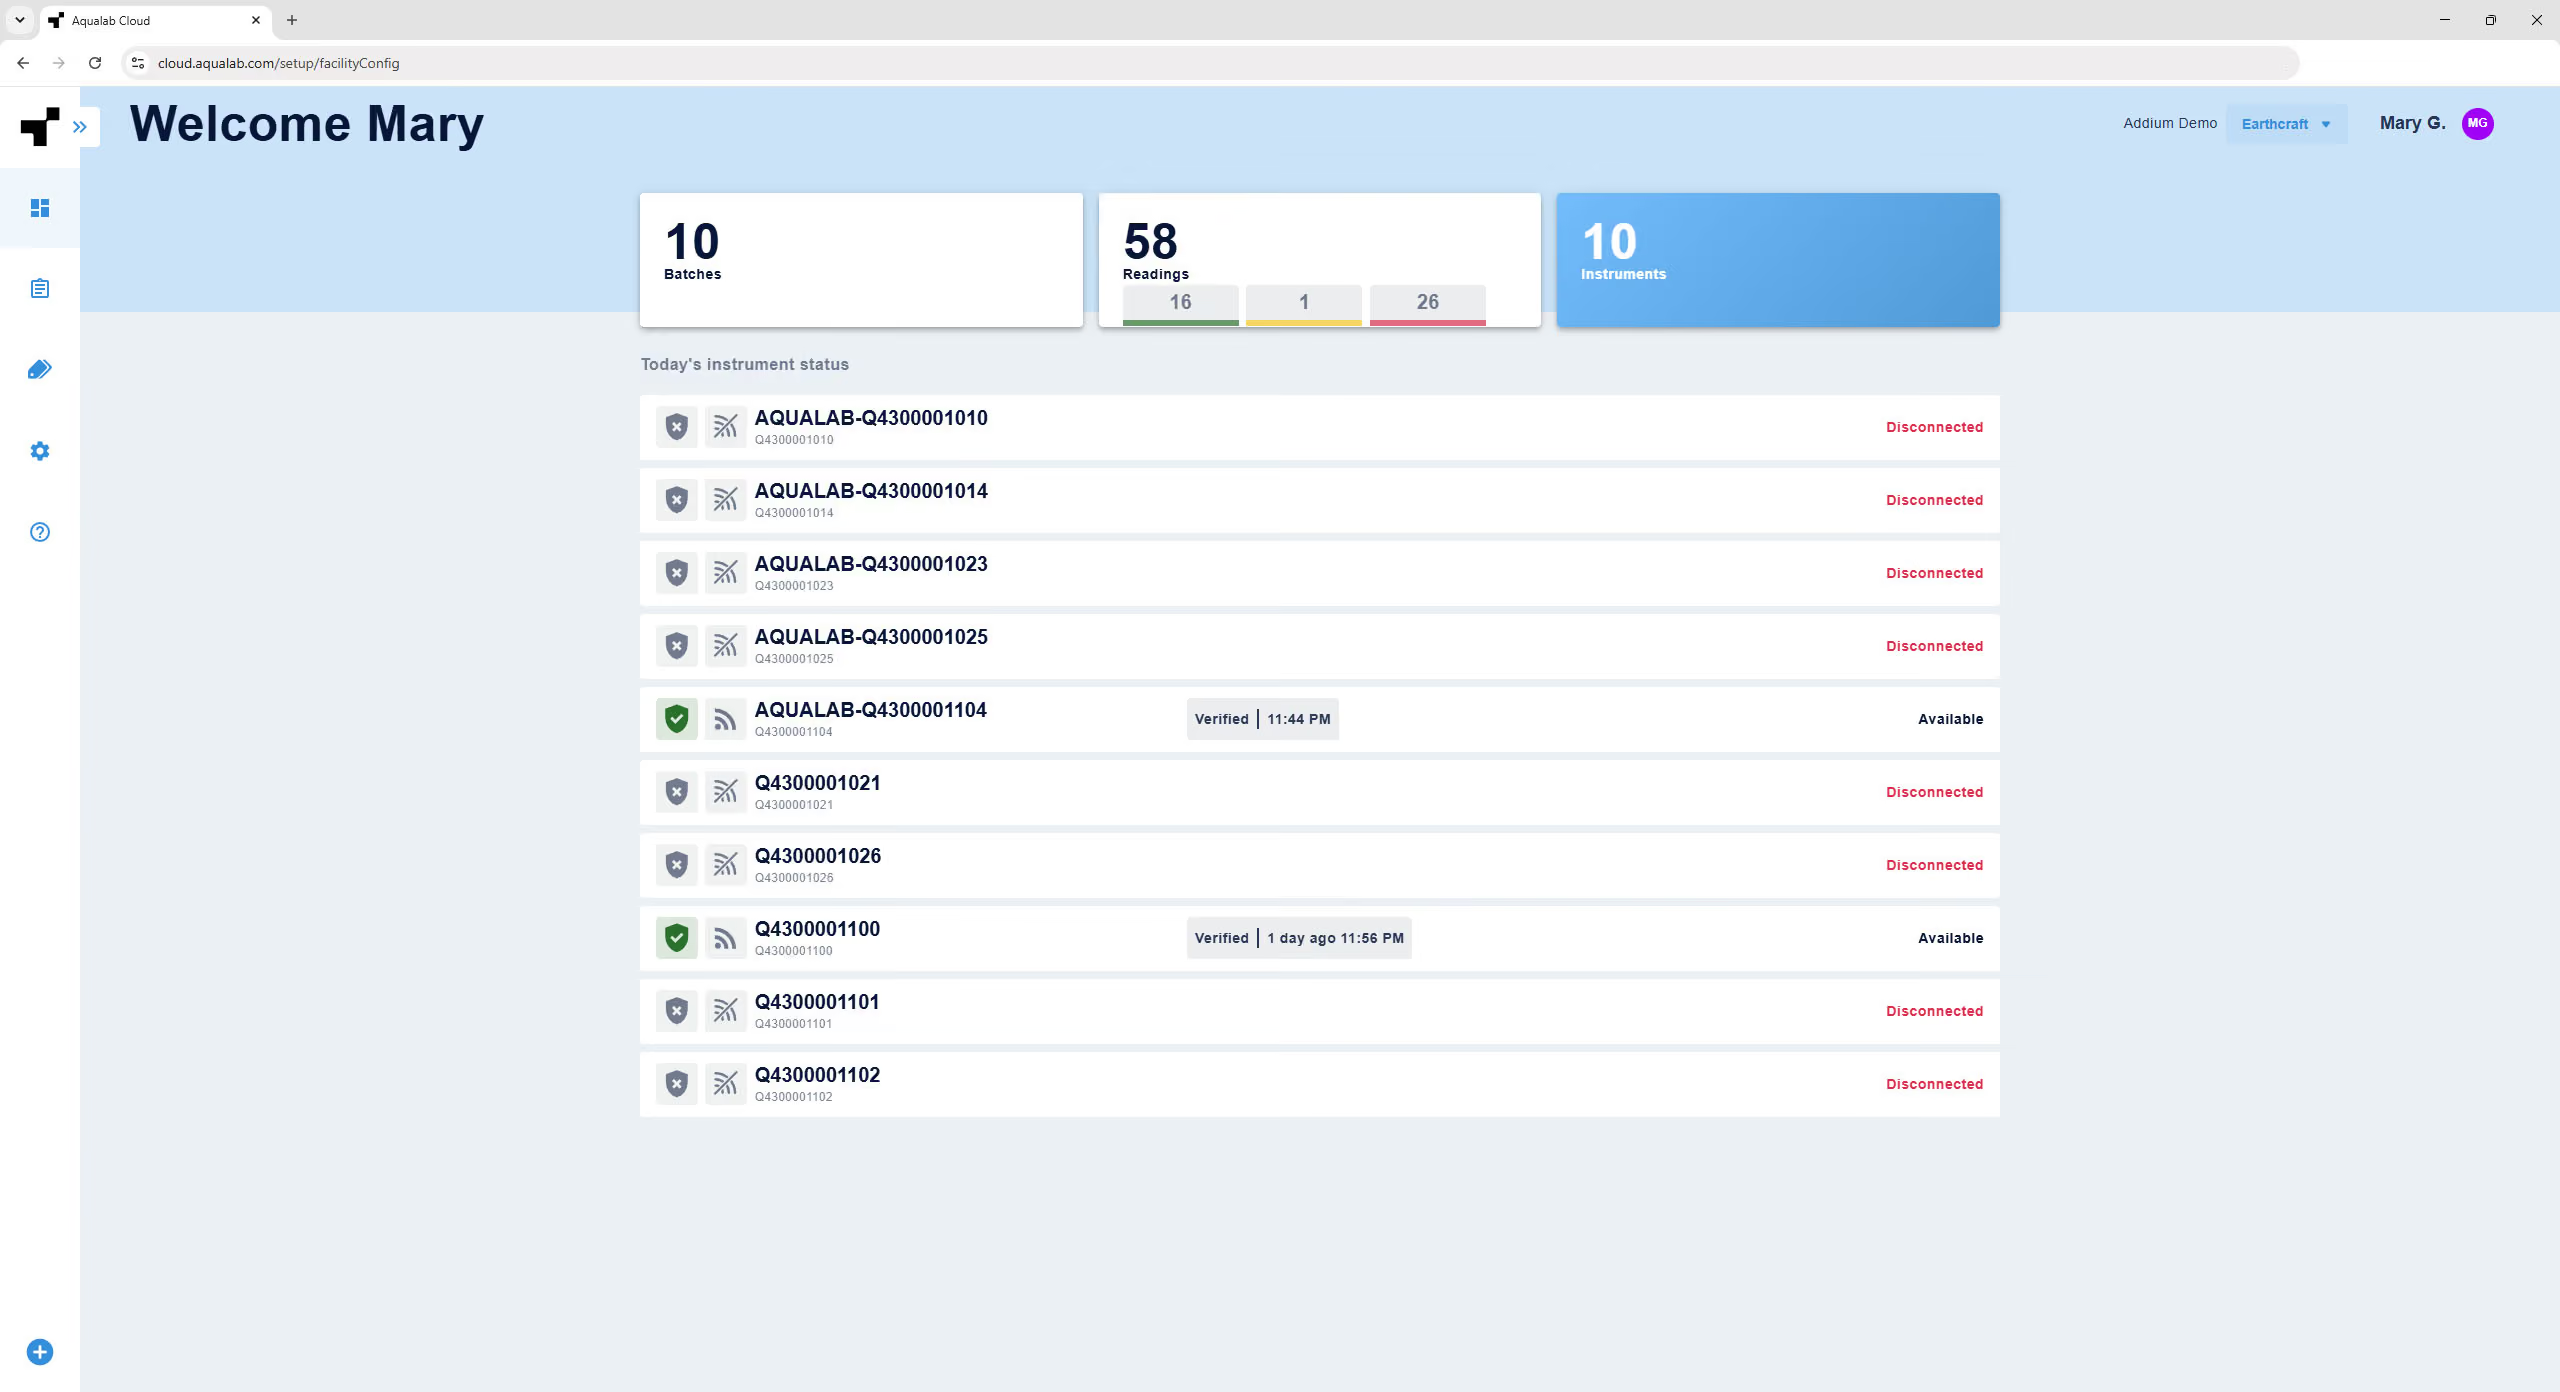
Today: Instruments lists your active (non-archived) instruments, sorted by most recently used. Each instrument shows its name and serial number, its verification status, and its connection status (connected or disconnected).
Selecting an instrument opens its detail page (see Chapter 11).
8. USER ACCESS MANAGEMENT
AQUALAB Cloud uses role-based access control. Admins manage users; both roles are administered under Settings > Users.
8.1 User Roles
Admin – Full access:
- Manage users (add, edit, archive)
- Configure facility, instrument, and security settings
- Create and archive products
- Create facilities
- Take readings and perform verifications
Technician – Limited access:
- Create and archive products
- Take readings and perform verifications
- Edit own profile (except role)
8.2 The User List
Open Settings > Users to see all active Admins and Technicians. Use the dropdown to view archived users. Select a user to open their profile.
8.3 Adding a User (Admin Only)
Select Add User and enter the user's First Name, Last Name, Role, Email and – optionally – Phone Number. A temporary PIN is generated and displayed to the Admin to be shared with the new user.
An invitation email guides the user to set a permanent PIN and password.
8.4 Editing a User Profile
A user can edit their own user profile, including First Name, Last Name, and Phone Number.
- A user cannot change their own role. Changing another user's role is an Admin only functionality.
- Admin only: The dropdown menu also provides options to Reset PIN (sends a reset email, or issues a temporary PIN if no email is on file), Resend Invite, and archive or revoke access.
Archived users are read-only.
8.5 Archiving and un-archiving a User (Admin Only)
To archive a user, select the ••• menu beside a user name in the user list and click ‘Archive’. This action logs the user out and removes them from the list. Reading data is not affected.
An Admin cannot revoke or archive their own access.
To un-archive a user, select ‘Archived Users’ from the ‘Users’ menu, select the ••• menu beside the user name in the user list and click ‘Unarchive’.
These actions are recorded in the Event Log.
Note
Revoked users are not notified automatically.
8.6 Your Profile and Account
Open the current-user menu in the upper-right corner by clicking the user icon and select Profile. You can modify your First Name, Last Name, Phone Number, and Language; change your password; and change your 4-digit PIN. Your email and role are displayed but cannot be modified.
Passwords must contain at least 8 characters, including one uppercase letter, one lowercase letter, and one special character.
Admin users also have an Account option to edit company details – Company, Facility, and Address.
9. REPORTS
Reports let you export and share readings. From the Results screen, apply the filters you need and select Report.
9.1 Creating a Report
Selecting Report offers two options: Create report, which uses the filters currently applied, and Saved reports. The Create Report screen prefills the date range, products, and batch count from your filters and shows the number of readings. Configure the report as follows:
- File format – .csv, .xls, or .pdf.
- Name – required.
- Columns – add, remove, and reorder columns. Available columns include Date/Time, aw, %MC, Temperature, Duration, Product, Batch, Lot Number, Custom Fields, User, Result, Instrument Name, Instrument SN, Block SN, Verified, and Notes. If too many columns are added, an overflow warning indicates that a separate page will be created. Your column selection and order are remembered for the next report.
- Group – for PDF exports only; list readings ungrouped, or group them by Product, Batch, Week, or Month. Options that do not apply to the current selected file type are greyed out.
9.2 Recipients and Scheduling
Add one or more recipient email addresses, separated by commas. When recipients are added, choose to send the report once or on a recurring frequency – Daily, Weekly, or Monthly – including the weekday and time of delivery. Select Send copy to myself to also receive it.
When recipients are added, the report is delivered by email on the chosen schedule via Download & Save. With no recipients, use Download or Download & Save.
A Downloaded report is generated as a one-time download.
A Saved report preserves the report configuration so it can be accessed and reused later.
10.3 Saved Reports
Manage saved reports from the Saved reports list. Select the ••• menu beside a report to Edit, Duplicate, or Delete it.
10. INSTRUMENTS AND VERIFICATION
This chapter describes how to monitor instruments and review their verification records in AQUALAB Cloud. For instrument-side verification procedures, see "Verification" in the AQUALAB 5TE User Manual.
10.1 Monitoring Instruments
Both Today: Instruments and Settings > Instruments list your instruments with their connection and verification status. Available instruments appear first, followed by disconnected, archived, and legacy instruments. One instrument can be designated as the facility default. One instrument can be set as the facility default.
Legacy instruments, such as AQUALAB 3 and AQUALAB 4 variants, cannot be added directly to AQUALAB Cloud. However, they can appear in AQUALAB Cloud as legacy instruments when you import a SKALA account using the Connect feature.
10.2 Instrument Details
Selecting an instrument opens its detail page, which has two tabs: Verifications and Instrument Details.
10.3 Verifications and History
The Verifications tab lists all verification records and verification correction resets for the instrument.
Each verification entry shows:
- Status – Passed or Failed, color-coded
- The standards read (failed standards in red; standards with an expired lot marked with a red alert symbol in the details page)
- A "Correction Applied" label, where applicable
- The user who performed the verification, and a timestamp
Selecting a verification opens its detail, which shows the measured and target values – plus a corrected value and an explanatory banner when a correction was applied – along with temperature, duration, lot number, and expiration. Expired lots are flagged in red.
You can add verification notes, which behave like reading notes, and export the complete verification history as a PDF or csv.
10.4 Instrument Settings
The Instrument Details tab shows the instrument's settings. For connected instruments, the following can be edited from AQUALAB Cloud: Verification Standards, Temperature Control, Verification Threshold, Verification Frequency, Required verification, Water Activity Reading Mode, and Instrument Name. Serial numbers (base and connected block) and connection status are displayed. Date and time and Verification Correction Reset cannot be changed from the web.
The instrument can be archived or unarchived from this page.
Note
Disconnected instruments cannot have their settings modified. Instrument settings can also be configured on the instrument itself (see "Instrument Settings" in the AQUALAB 5TE User Manual); changes synchronize between the instrument and AQUALAB Cloud.
11. DATA INTEGRITY AND COMPLIANCE
AQUALAB Cloud includes features that support data-integrity practices and recordkeeping.
11.1 Audit Trail
The Event Log provides a time-stamped, attributable record of key actions taken in a facility (see Section 3.7), supporting traceability requirements.
11.2 Reading Integrity
Readings uploaded to AQUALAB Cloud are retained together with their metadata, including the user, instrument, verification status, and timestamp. Readings are not edited or deleted. A reading can be voided, which preserves the original record while marking it as voided, and the action is itself traceable. Notes are append-only.
11.3 Regulatory Alignment
These features support data-integrity principles such as ALCOA+ and assist organizations operating under requirements such as FDA 21 CFR Part 11 and HACCP-based food safety programs. Meeting any specific regulation also depends on your facility's own procedures and validated use of the system. Consult your quality team for guidance specific to your operation.
12. TROUBLESHOOTING
Use the table below to troubleshoot. If there is no solution to the issue listed in the table, please contact Customer Support.